
z-song Laravel-admin on Cloudjiffy
Laravel is a free and open–source PHP framework. It is very useful for developing web applications using a Model-View-Controller (MVC) model. Most of the organizations and developers already recognized the power of the Laravel framework.
Z-song is a Laravel administrative interface builder that helps you to build CRUD backends just with a few lines of code. Build a full-featured administrative interface in ten minutes
It has XSS via the Slug or Name on the Roles screen, because of mishandling on the “Operation log” screen.
Along with the CRUD generator, it also has pre-built CRUDs like permission manager, settings, news manager, page manager, and menu manager. Some of the packages in the Backpack family serve as extensions: logs, backups, and some other features can be added to your app quite easily.
Laravel admin dashboards have incredible flexibility to integrate multiple e-commerce templates, packages, libraries, and other utilities. For Bootstrap lovers, there are many Bootstrap-based admin panels available in the market that are highly customizable and easy-to-integrate with Laravel as well.
Requirements
- PHP >= 7.0.0
- Laravel >= 5.5.0
- Fileinfo PHP Extension
- MySQL or MariaDB
How to install Laravel-admin on CloudJiffy?
STEPS –
Step 1: Login to CloudJiffy.
Go to https://app.cloudjiffy.com/
Login using your credentials.
Step 2: Create Environment
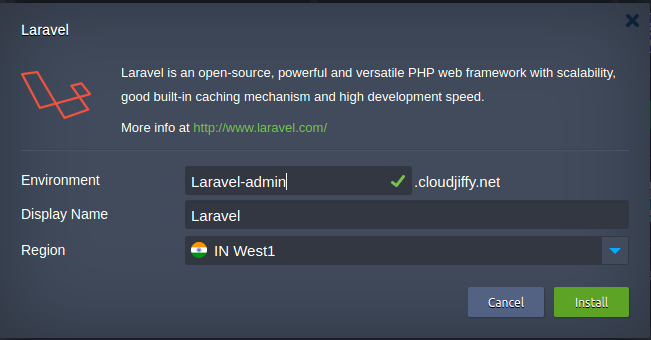
- Create an Environment that satisfying PHP and Laravel requirements. For this, we have one-click installation Laravel in the Marketplace.
Go to Marketplace > search for Laravel > Add environment name > Install

- To satisfy MySQL or MariaDB requirements, once Laravel installation is done go to change environment topology > select DB and click on apply.

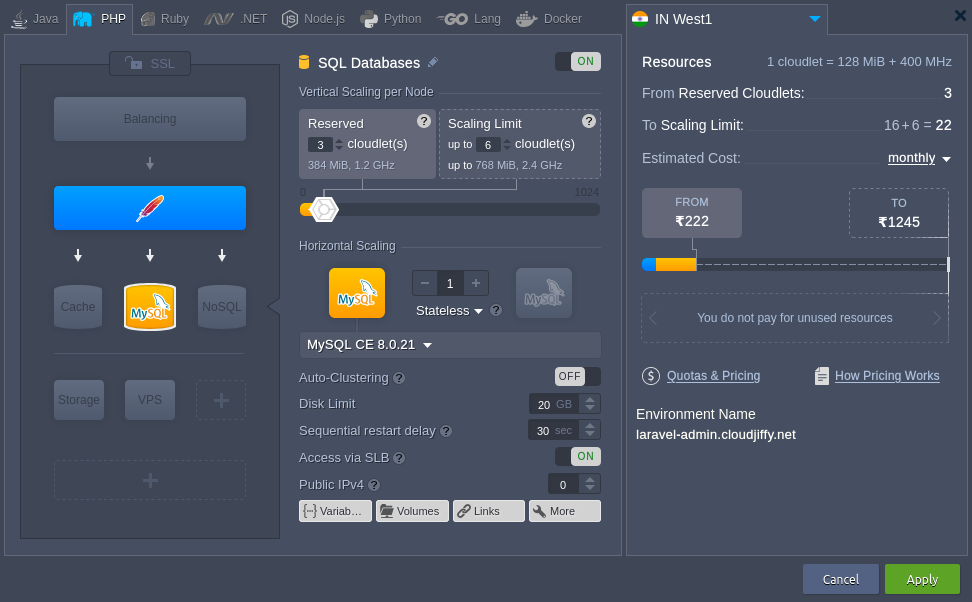
Note: You will get the PHPMyAdmin link and its credentials on the registered email id.
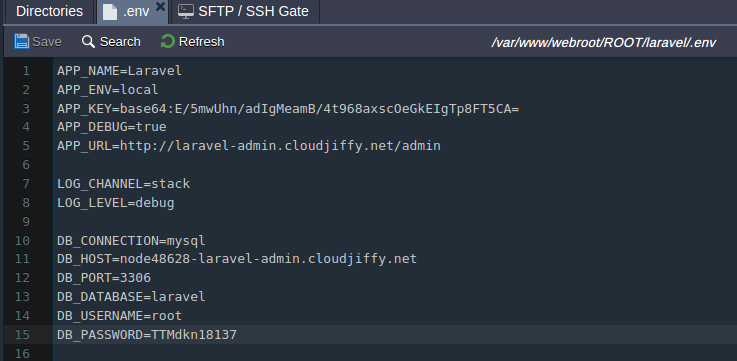
Create the database and fill the details in the .env file.
Step 3: Update the details in .env file
You can find the .env file in the /var/www/webroot/ROOT/laravel
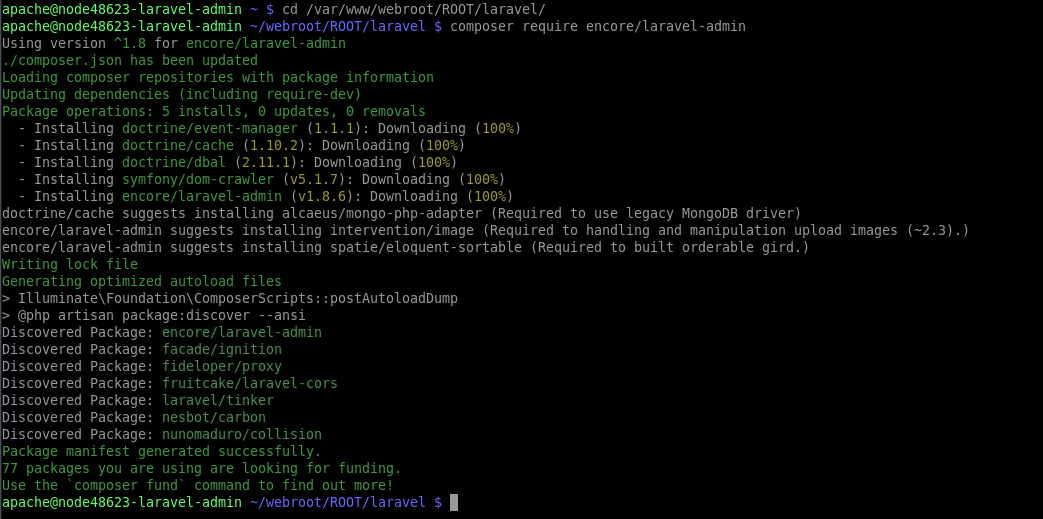
Step 4: Start the installation process of Laravel-admin
- Before proceeding further with the installation make sure that the database connection settings are correct.
cd /var/www/webroot/ROOT/laravel
composer require encore/laravel-admin
Then run these commands to publish assets and config:
php artisan vendor:publish –provider=”Encore\Admin\AdminServiceProvider”

After run command you can find config file in config/admin.php, in this file you can change the install directory,db connection or table names.
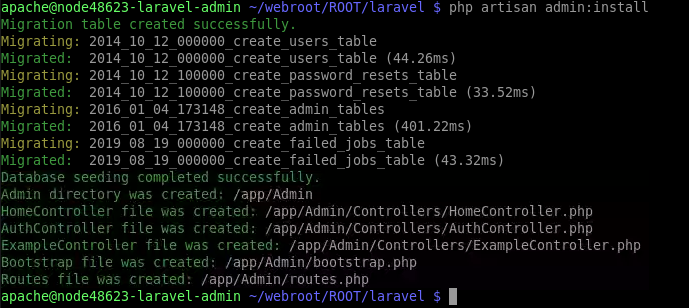
At last run following command to finish install.
php artisan admin:install
Step 5: Set the document root
You can set document root in /etc/httpd/conf/httpd.conf
DocumentRoot /var/www/webroot/ROOT/laravel/public
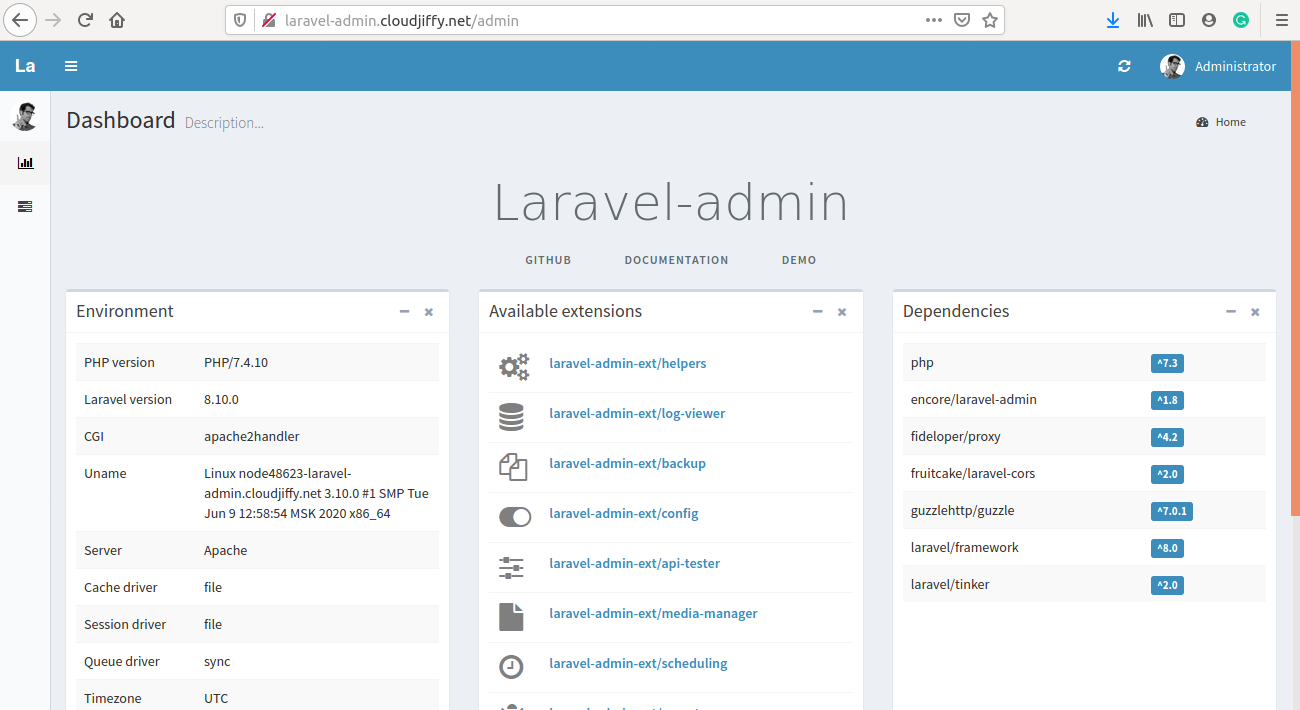
Step 6: Access the URL
Open http://laravel-admin.cloudjiffy.net/admin
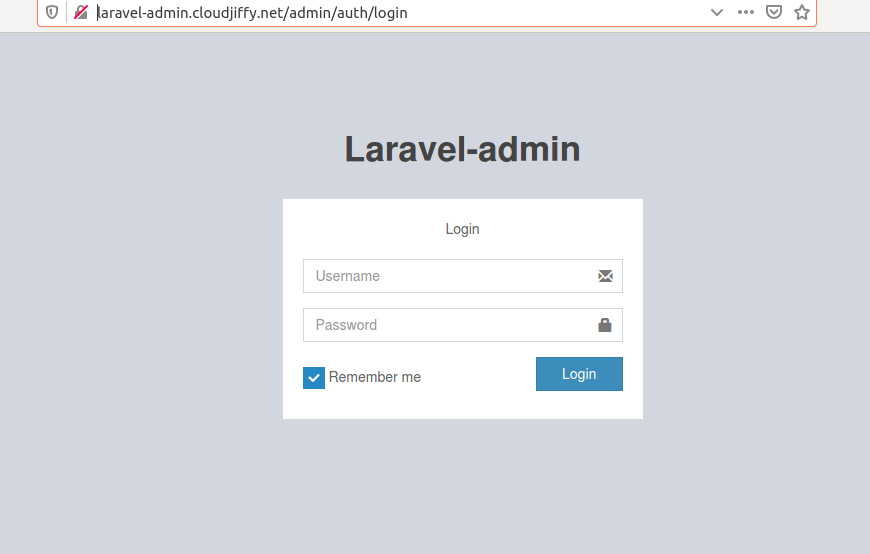
Use username admin and password admin to login.
Note: Change the password.
Don’t have a CloudJiffy account? Visit https://cloudjiffy.com and click on Free Signup for free 14 days trial.