
Store and Deploy Apps via Gitblit on Cloudjiffy

Gitblit is one of the most popular tools for managing, viewing, and serving your repositories within Git – a widely spread VCS (version control system) for software elaboration. Mainly, Gitblit is designed for small workgroups, which work with centralized repositories, and supports a variety of remarkable features, such as access control, the repository’s content displacement via the web, multiple repositories management, ability to be integrated with other Git-management solutions, etc.

So, let’s find out how to host Gitblit at Cloudjiffy Cloud and, subsequently, simplify your apps management with its help. You can automatically get a preconfigured ready-to-work Gitblit instance up and running within minutes using our one-click installation widget:
Why use it on CloudJiffy?
- Easy to manage
- One-Click Installation
- Charges based purely on consumption (Pay As You Consume pricing) Thus helps you save cost
- Real-time scaling with an increase in users
- Data replication and backup solution to keep your data safe.
- Highly secure infrastructure
- Inbuilt CDN to cater to a worldwide audience
Create an Environment
Through the Cloudjiffy web interface, a “Gitblit” instance can be automatically deployed in a few clicks.
STEPS
Step 1: Login to CloudJiffy.
Go to https://app.cloudjiffy.com/
Login using your credentials.
Step 2: Click on “Marketplace” to view the list of applications that can be installed automatically.
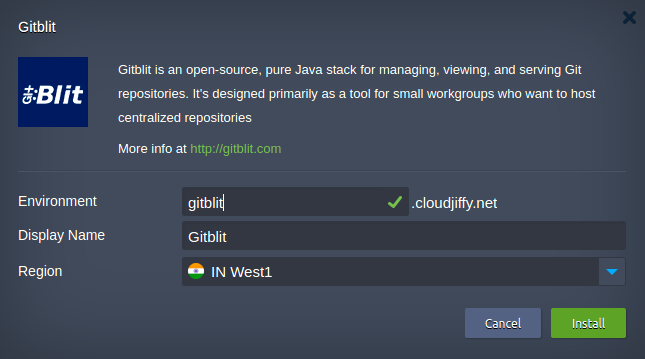
Step 3: A new window displaying the Apps will open, Select the “Gitblit” instance and click on “Install”.
Step 4: Once the process is completed, you can click the Open in browser button to ensure the application is actually working fine.

Create a Gitblit Repository
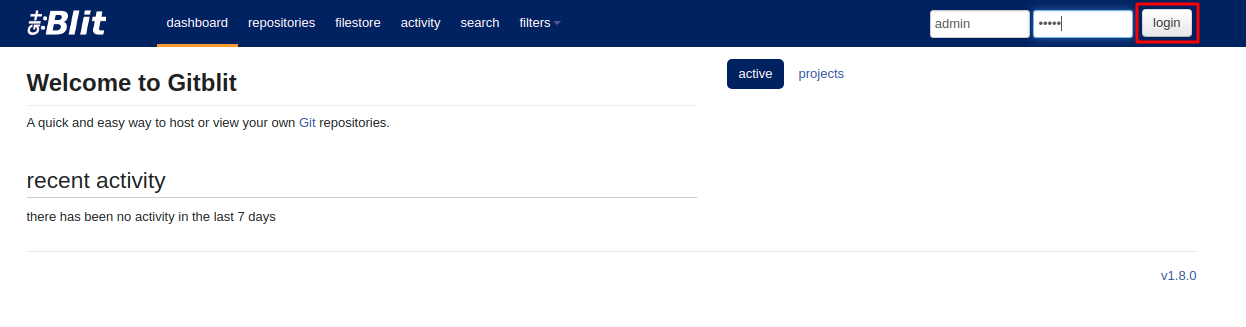
- To start working with Gitblit, you need to login within its main page with the default admin/admin credentials
Tip: We recommend changing the password to your custom one as soon as possible for security assurance.
- Once inside, switch to the repositories tab at the top pane. Here, you will see the list of your repos (if there are any) and will have the ability to manage them.
Let’s create a new repository by clicking the same-named button to the right.

- Set the name for your new repo (for example, GitBlitRepo) are adjusted all the rest configurations according to your preferences (or just leave the default values).
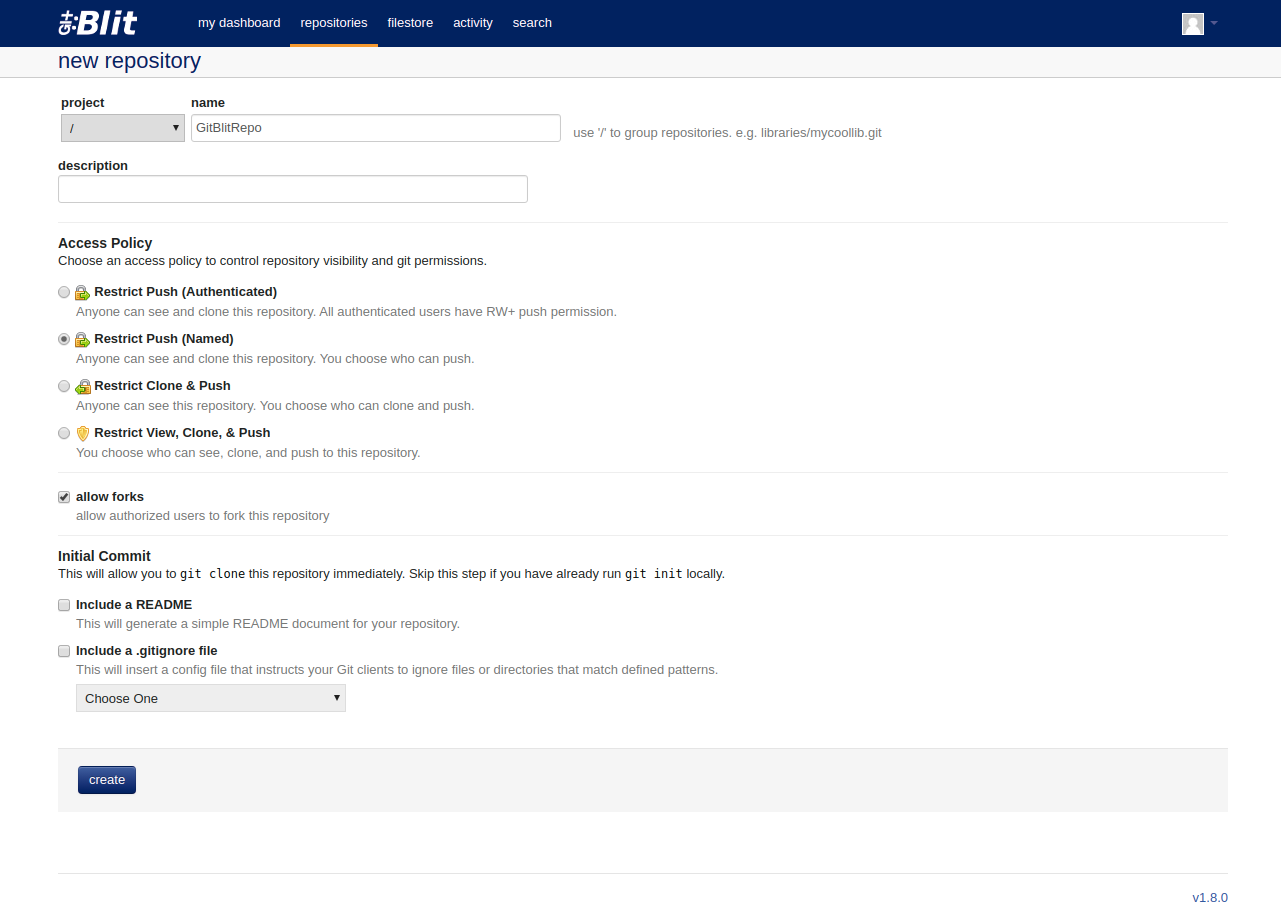
Click create at the bottom of a page when ready.
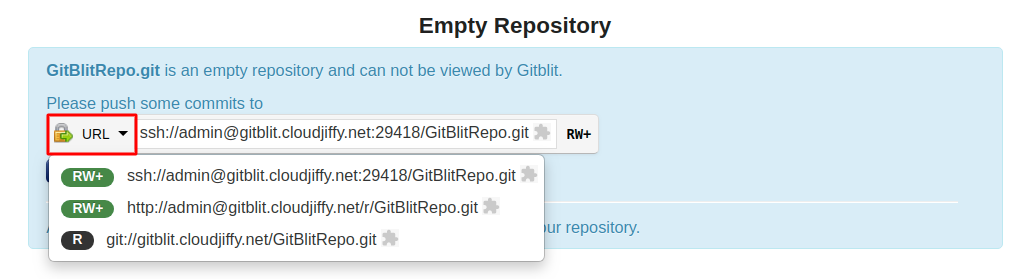
- The specified empty repository will be shown in a moment.
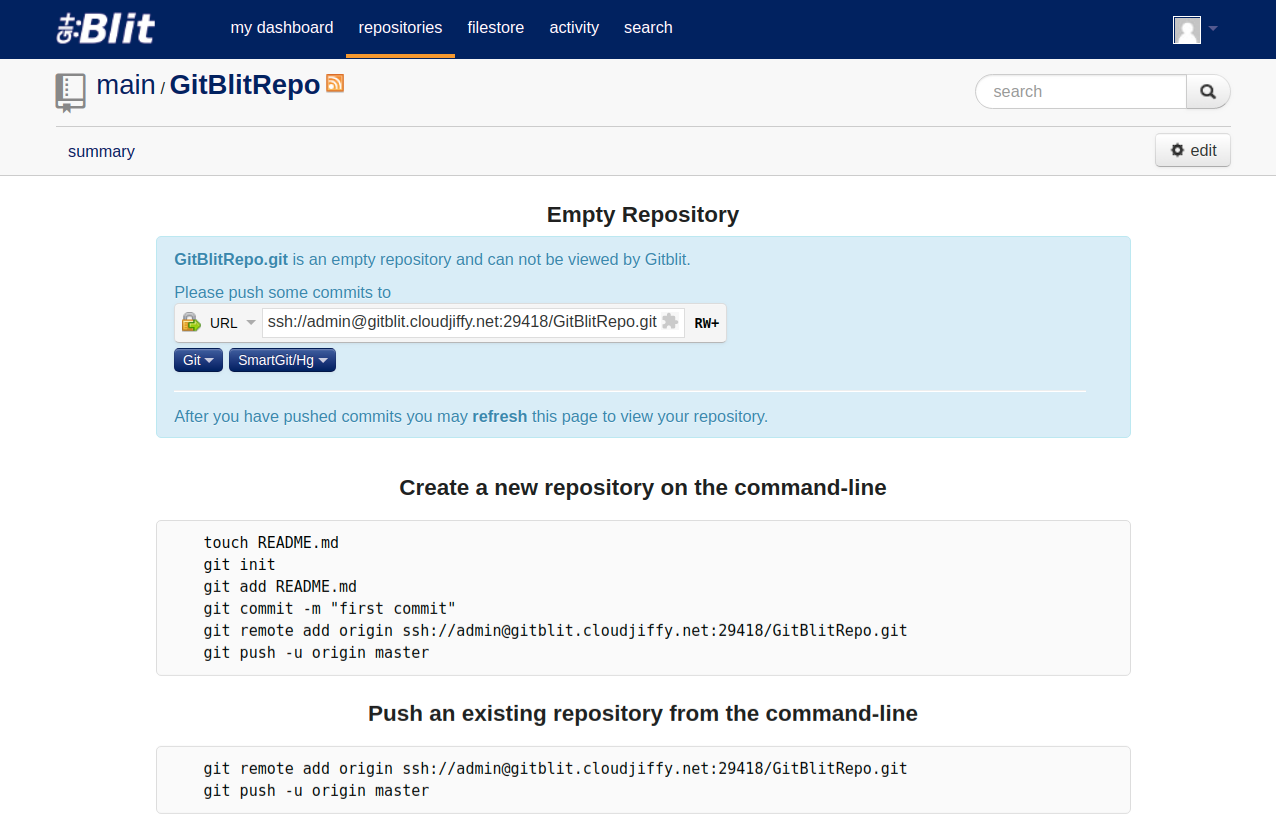
- Now you should push (add) your project to this repo. The simple steps below will help you with this:
- first, initialize your local repository (i.e. create a folder to store your projects’ files locally):
git init - define the files your project should consist of (just as an example, we’ll add the README file to it)
git add README.md - save these changes at the local repo with a commit message (e.g. mark it as a first commit)
git commit -m "first commit" - specify the previously created GitBlit repository as a remote one for your local Git repo
git remote add {name} {repo_url}
- first, initialize your local repository (i.e. create a folder to store your projects’ files locally):
- Now you should push (add) your project to this repo. The simple steps below will help you with this:
where:
- {name} – appellation for your remote repository
- {repo_url} – link to your GItblit repository, which can be found within the drop-down list on the top of the page from the previous step.

- finally, push your local project to the Gitblit repository:
git push -u {name} {branch}
Where:
{name} – name of the remote Gitblit repository your project should be copied to (state it the same as above)
{branch} – projects’ branch, that should be updated with this new data
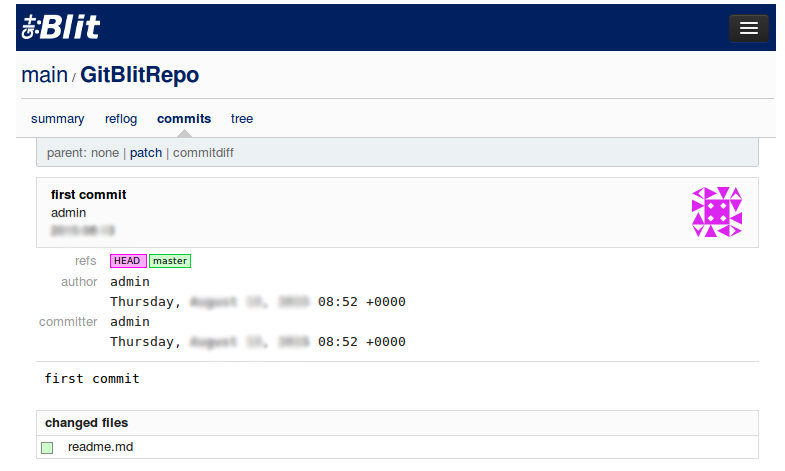
After this is done, refresh the Gitblit page to view your repository with full data on it (here, you can also switch to the commits section to see the information on the latter changes applied, such as author, time, and date of a commit, list of changed files, etc).
Deploy Project via Gitblit
Now, let’s discover how to deploy your project from a Gitblit repository into the Cloudjiffy Cloud.
- First, create a separate environment for your application hosting. Let’s consider a case with a Java project, where, in addition to the application server node, you’ll need to use a build tool (i.e.Maven).
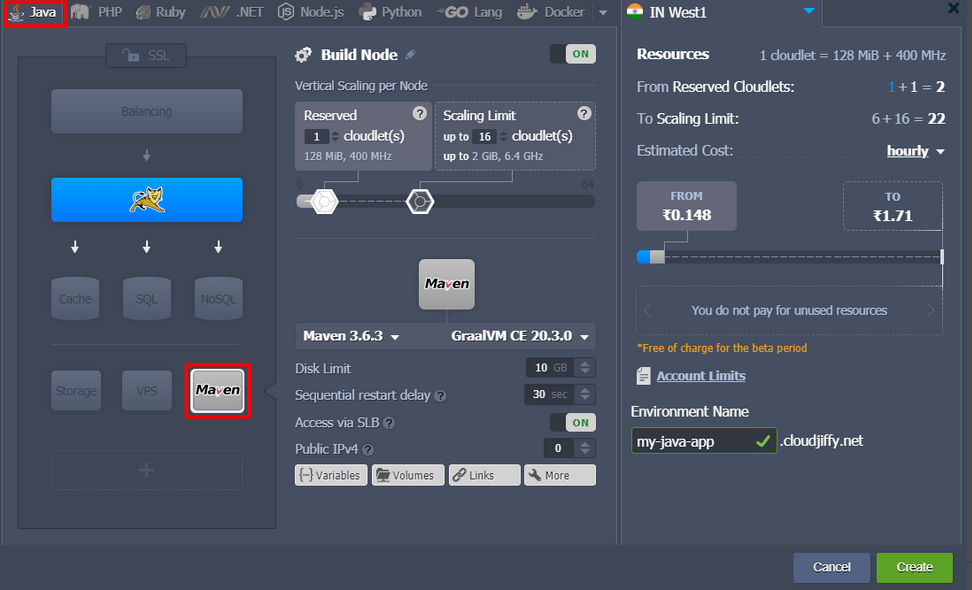
Note: that the extra Maven node is required for Java projects only, while for the rest of the engines build is performed automatically while adding a project to the application server. Refer to the appropriate document below in case you need details on how to accomplish this:
- Maven for Deploy via Git/SVN
- Deploy PHP Projects via Git/SVN
- Deploy Ruby Project via Git/SVN
- Deploy Python Projects via Git/SVN
- Deploy Node.js Project via Git/SVN
2. Click the Add project button next to the Maven node after your environment is successfully created.

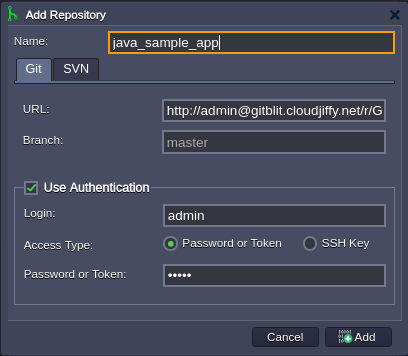
3. In the appeared Add project frame, choose the Git tab and fill in the required fields:
- enter the Name of project (for Maven only)
- Create a new repository and specify URL and Branch of the the repository you’ve previously created
- in the Use authentication block, fill in the following fields:
- Login used to enter your repo
- Password for the above specified login
- choose your Environment Name from the drop-down menu
- type the Context you would like to deploy your project to
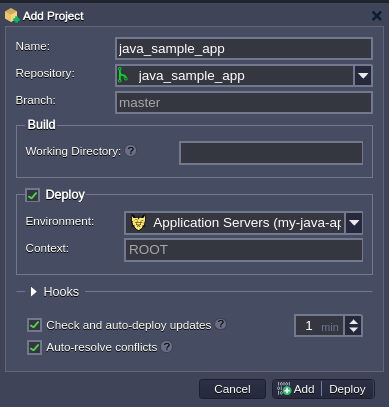
Confirm the project addition with the Add button.
4. Next, click the Build and deploy option next to the just added project.
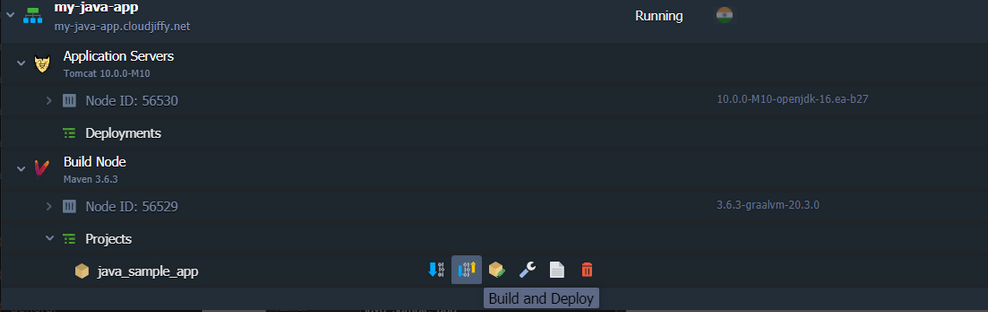
5. Once your application is deployed, you can open it (by pressing the Open in browser button for the environment) and ensure everything works fine.
Tip: Subsequently, all the newly performed at the remote repository changes can be easily applied to your hosted app with just a single click – simply select the same Build and deploy button (or Update from GIT in case of working with another engine) next to your project and wait for the redeployment to be completed.
That’s it! Now, your own Gitblit repository and project within it are both hosted hand by hand at Cloudjiffy Cloud. Enjoy!
Don’t have a CloudJiffy account? Visit https://cloudjiffy.com and click on Free Signup for free 14 days trial.