
Snipe-IT on CloudJiffy
Snipe-IT is a Free Open Source (FOSS) project built on Laravel 5.5
Snipe-IT was made for IT asset management, to enable IT departments to track who has which laptop, when it was purchased, which software licenses and accessories are available, and so on.
This is web-based software. This means there is no executable file (aka no .exe files), and it must be run on a web server and accessed through a web browser. General features of Snipe-IT are as follows:
- Mobile-friendly for asset updates on the go
- Runs on any Linux, Windows or Mac web server
- Web-based software so it works on any device
- Slack notification integration for checkin/checkout
- Tons of security features to keep your data safe
- Includes a robust JSON REST API
- Translated into several languages for easy localization
- Per-user language support for distributed teams
- One-click (or cron) backups
- LDAP login/user sync
Why use it on CloudJiffy?
- Easy to manage
- Charges based purely on consumption (Pay As You Consume pricing)
- Real-time scaling with an increase in users
- Data replication and backup solution to keep your data safe.
- Highly secure infrastructure
- Inbuilt CDN to cater to a worldwide audience
Requirements:
- PHP 7.1.2 or higher
- MySQL or MariaDB
- PHP Extensions: openssl, pdo,mbstring,tokenizer,curl,zip,fileinfo,bcmath,simplexml,gd.
Note: After enabling extensions in php.ini file, restart the app server.
To enable extensions refer to the below link:
https://cloudjiffy.com/portal/knowledgebase/152/Extensions-in-PHP.html
File Structure
Since Snipe-IT is built on Laravel, it follows a standard Laravel MVC file structure. Within the Snipe-IT project, you’ll see a public directory. That directory should be set as your document root.
You can set document root in /etc/httpd/conf/httpd.conf
Important: For all command-line commands mentioned in this documentation, you should ALWAYS be running those commands from the Snipe-IT project directory.
How to install Snipe-IT on CloudJiffy?
STEPS –
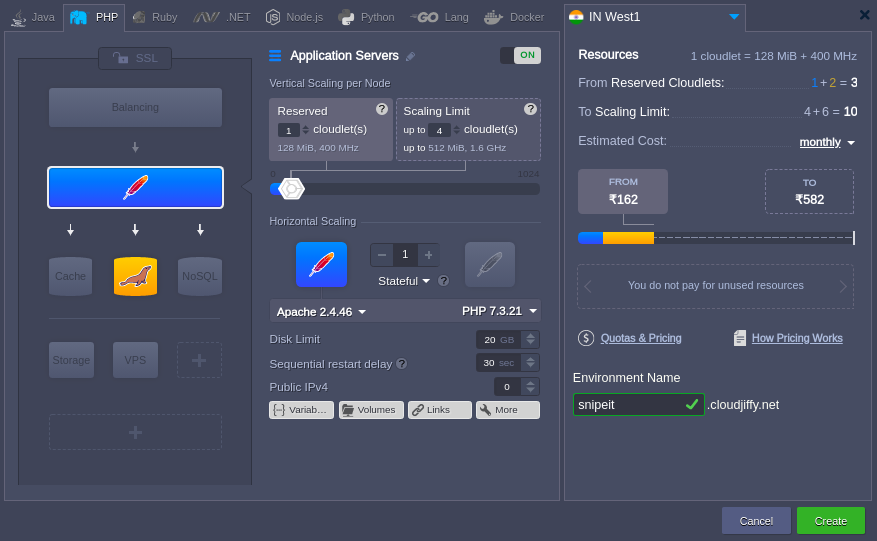
1 – Create Environment with Apache server and DB server
Click on New Environment > Select Apache and DB server
2 – Download
Take the web ssh of an application server and then go to document root and run the below command:
git clone https://github.com/snipe/snipe-it
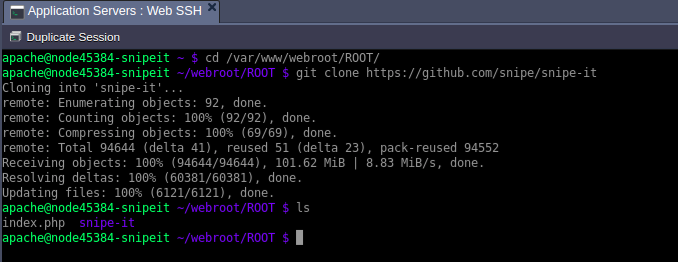
Note: To update moving forward, you’ll just run git pull to grab the latest.
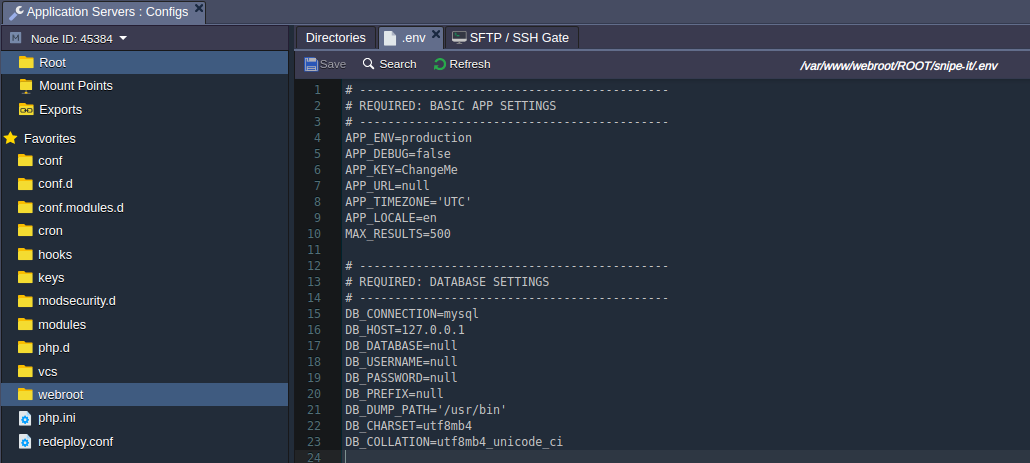
3 – Configuration
All system configuration variables are stored in a single .env file in your project’s root. To get started, copy over the .env.example file to a new .env file:
Go to snipe-it folder and run below command:
cp .env.example .env

Important: Snipe-IT caches these variables for you to speed things up. If you make subsequent changes to this file, make sure you run ‘php artisan config:clear’ to clear the compiled version to see your changes.
To check and configure the options in .env file refer to the below link:
https://snipe-it.readme.io/docs/configuration
Note:
- You will get the phpmyadmin link and it’s credentials on the registered email id.
Create the database and fill the details in the .env file.
- Make sure there are no trailing spaces after the values you add in your .env file, as that can sometimes cause unexpected results.
- You can do the changes in the required fields and rest you can comment/delete.
4 – Install Dependencies
Important: Never run composer as a super-user or Administrator. Always run it as the user that owns the Snipe-IT files. Running composer as a super-user will break things in ways that will be difficult to debug later. Just don’t do it
cd /var/www/webroot/ROOT/snipe-it/
curl -sS https://getcomposer.org/installer | php
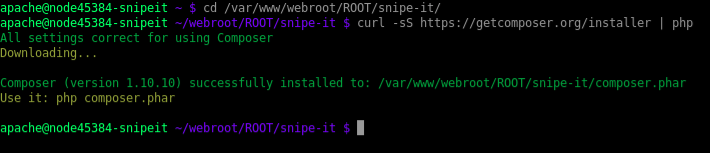
php composer.phar install –no-dev –prefer-source
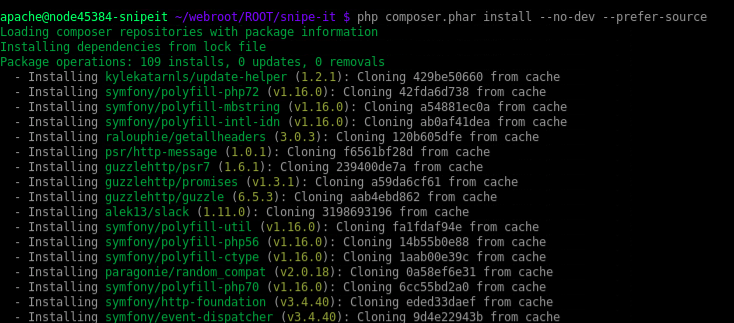
It will take some time to complete.
5 – Generate your App key
php artisan key:generate
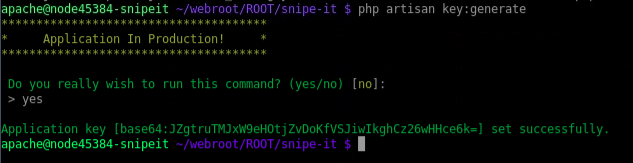
Important: Make sure you keep a copy of your APP_KEY in a safe place, for example a secure password manager. This key is required to decrypt any encrypted fields in the database.
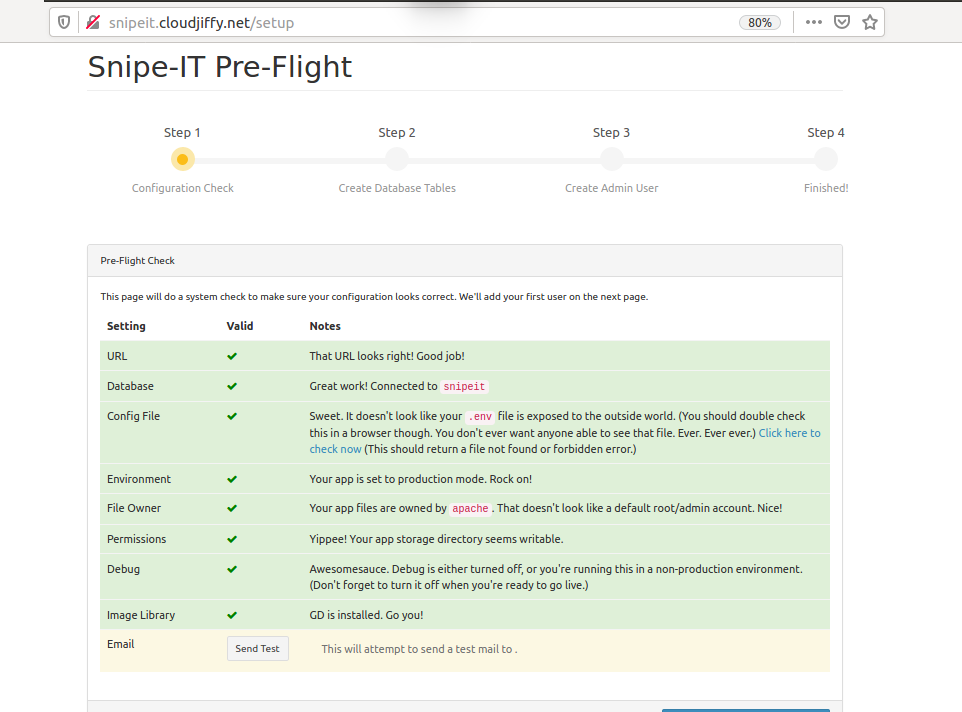
6 – Pre Fight and Setup
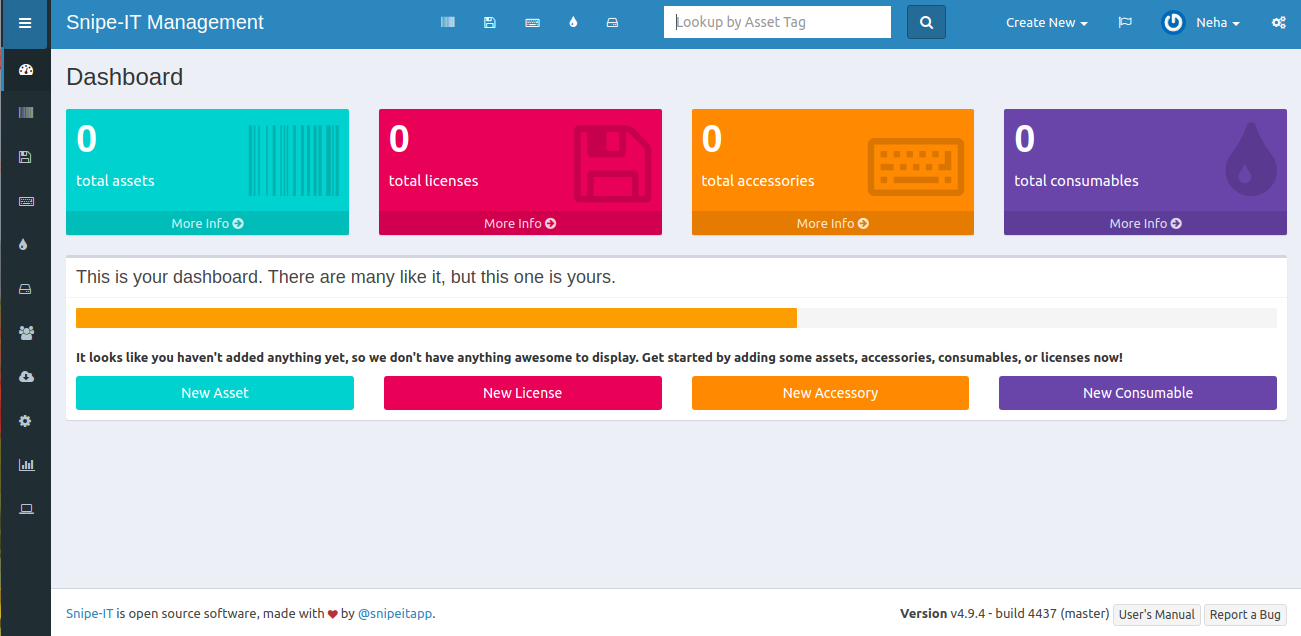
Snipe-IT comes with a pre-flight check and setup to help make sure your environment is set up correctly, create the database tables and add your first admin user.
If you’ve been able to get through the first few steps (Downloading, Configuration, and Installing Dependencies) successfully, you should be ready to start the pre-flight.
Just go to your Snipe-IT URL (whatever you’ve set that to) in a web browser, and you should be redirected to the Pre-Flight screen. If you see a “Whoops” error or some other error, check the Common Issues page to see where you might have gone wrong.
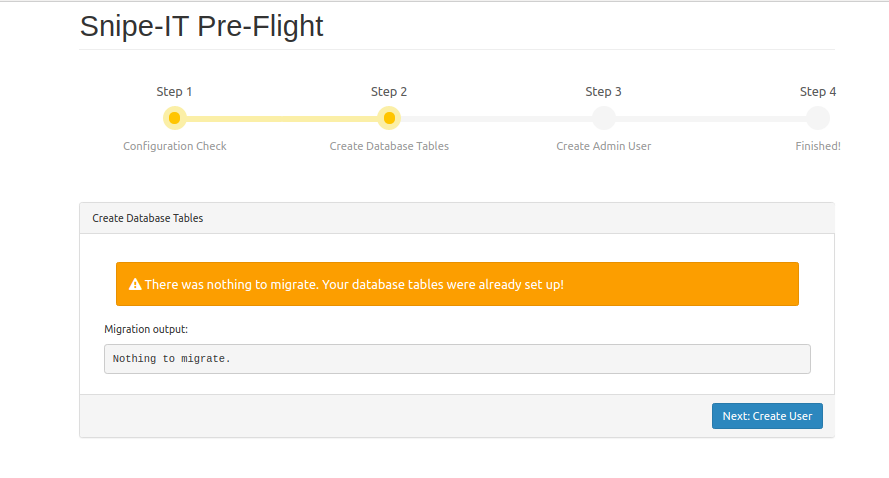
Simply follow the on-screen instructions. You’ll be prompted to create your first user, with an option to email yourself the credentials you used to create your user.
The database migrations page will just show you that there’s nothing to migrate if your migrations have already completed.
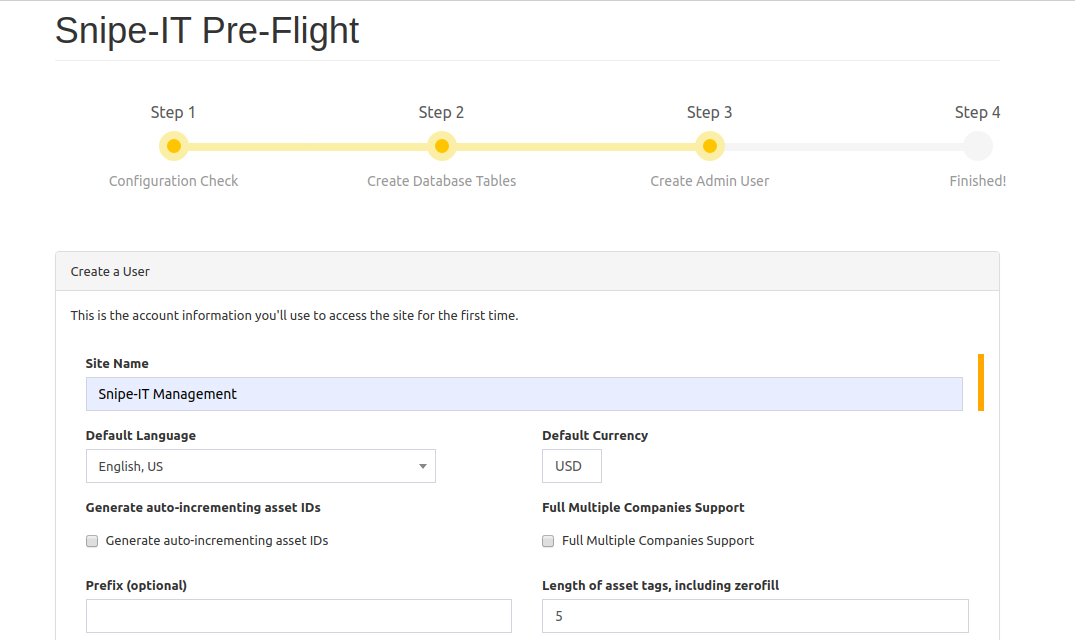
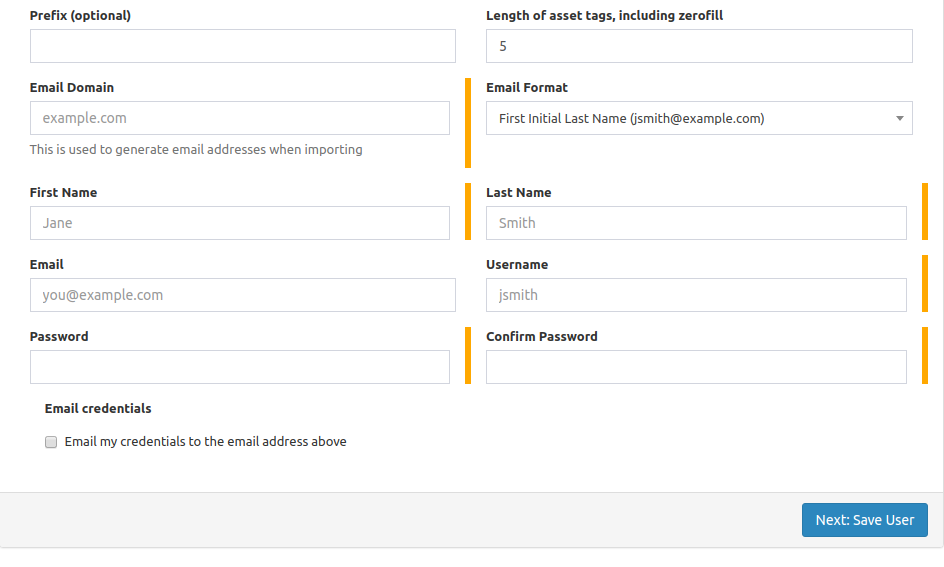
Add the necessary values in the above options and click on save user.
Note: If for some reason you need to delete your database or database tables and start the pre-flight again, be sure to clear your browser cookies before attempting to restart the pre-flight.