
Private GitLab Server Automatic Installation with Cloudjiffy PaaS
Git repositories became an integral part of the development process, and usually, they are administered with GitHub or BitBucket. But while having a private project you may not want to trust the code to the tool hosted by a third party. So in order to get the required control, flexibility, and simplicity within their own dedicated server, developers turn to GitLab installation.
Professing an open-source business model, a dedicated GitLab server can be easily deployed to a cloud environment. And the deployment with the help of Docker containers allows us to immensely increase elasticity and scaling for extra efficiency. In this article, we will demonstrate how to combine cutting-edge technologies such as GitLab and Docker using Jelastic PaaS automation functionality.
GitLab Package Overview
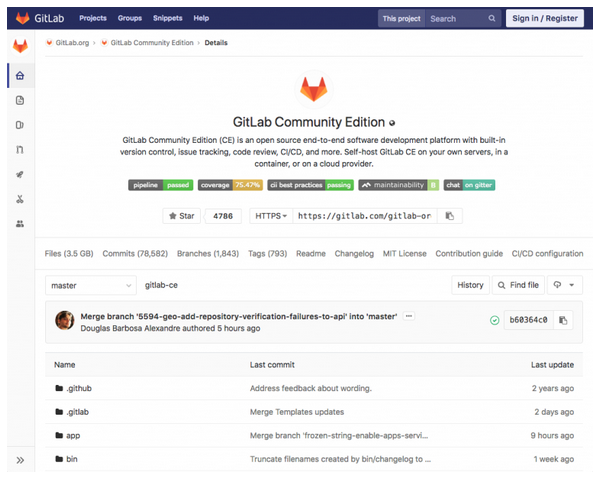
We found a popular repository sameersbn/docker-gitlab with a detailed multipage manual on how to get running a private GitLab Server in containers. This project is licensed under MIT and distinguished by a high rate and numerous forks that prove its sustainability.

To make it even better, Cloudjiffy PaaS added value to the mentioned repository by including:
- Elastic resource provisioning with automatic vertical scaling
- Built-in and Let’s Encrypt SSL for custom domains
- Auto-discovery of Runners while scaling them horizontally
- Injection of required dynamic environment variables
- Environment and Domain Name
- Security Tokens
- Required Passwords
- Volume Configs
- Cost-efficient cloud hosting with Pay-As-You-Use pricing model based on real usage only
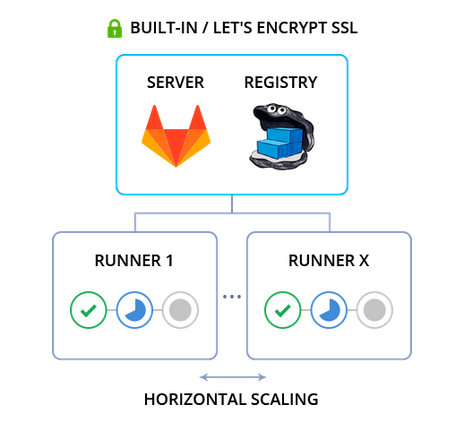
The listed options are packaged with GitLab server as DevOps Lab manifest for automatic installation on top of Jelastic. By default, the whole topology consists of two Docker Engine nodes:
- the first includes Git Server and private Container Registry
- the second goes with GitLab Runner
The automation package performs the following actions:
- Creates 2 system containers with pre-installed Docker Engine CE and docker-compose utility
- Generates and installs self-signed or Let’s Encrypt SSL certificates, as well as shares them with Runners via NFS volume
- Injects dynamic environment variables such as tokens, passwords, and environment domain
- Deploys GitLab Server and Container Registry via docker-compose.yml in one Docker Engine node
- Creates one Runner in a separate Docker Engine and registers it automatically in GitLab Server
- Automates discovery of newly added Runners upon horizontal scaling
Why use it on CloudJiffy?
- Easy to manage
- One-Click Installation
- Charges based purely on consumption (Pay As You Consume pricing) Thus helps you save cost
- Real-time scaling with an increase in users
- Data replication and backup solution to keep your data safe.
- Highly secure infrastructure
- Inbuilt CDN to cater to a worldwide audience
GitLab Server Installation
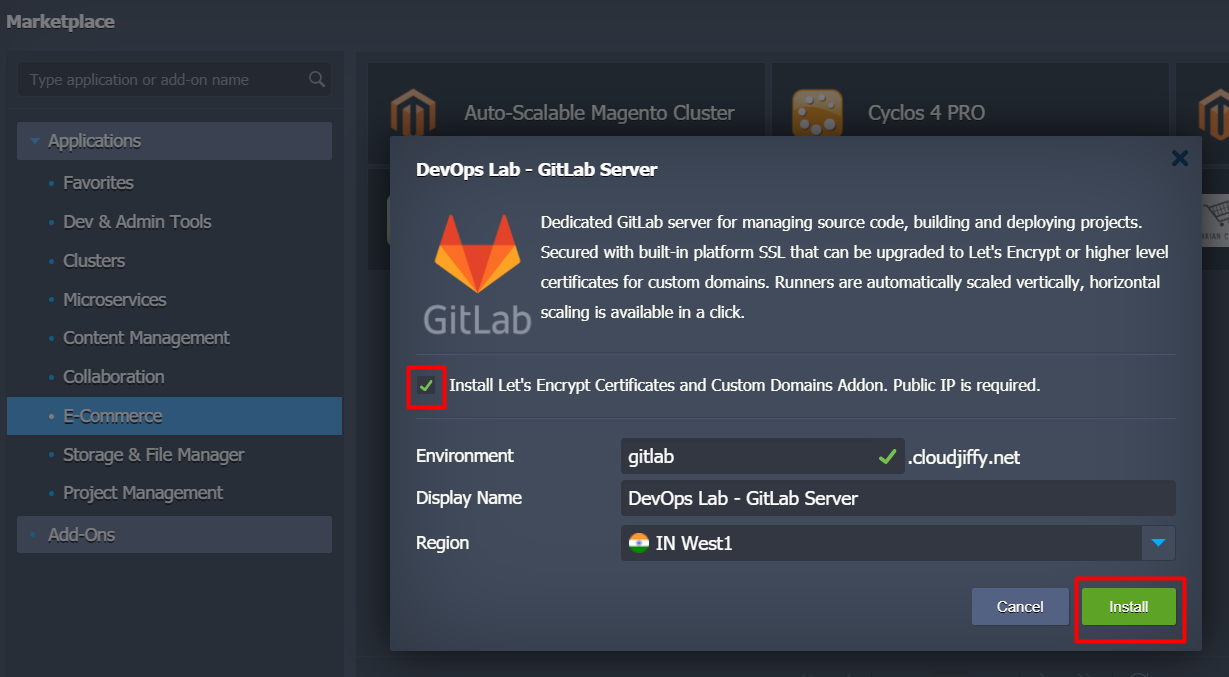
Let’s walk through the installation process. Enter the Cloudjiffy dashboard, find GitLab in the Marketplace, and press Install.
Alternatively, you can import the DevOps Lab manifest by pressing the Import button.
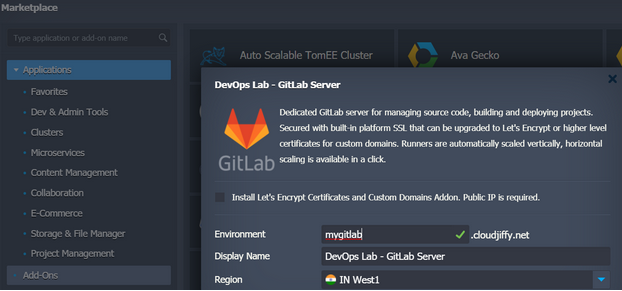
In the opened popup dialog, specify the Name of Environment and choose the preferred Region. Click on the Install button.
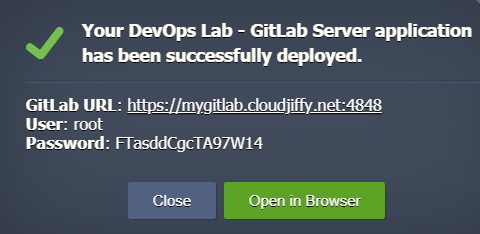
Wait a few minutes till the installation is completed. Using credentials from the successful installation message or received an email notification, log in to the admin panel by pressing Open in Browser.
Scaling Runners Horizontally
When a team is growing and private GitLab Server becomes busy with builds of many different projects, it’s time to consider the increasing number of Runners to build and deploy. The package automation helps to get benefits of horizontal scaling without the need to perform any extra manual configuration. Each Runner is going to be placed in a separate container and automatically registered to the Git server.
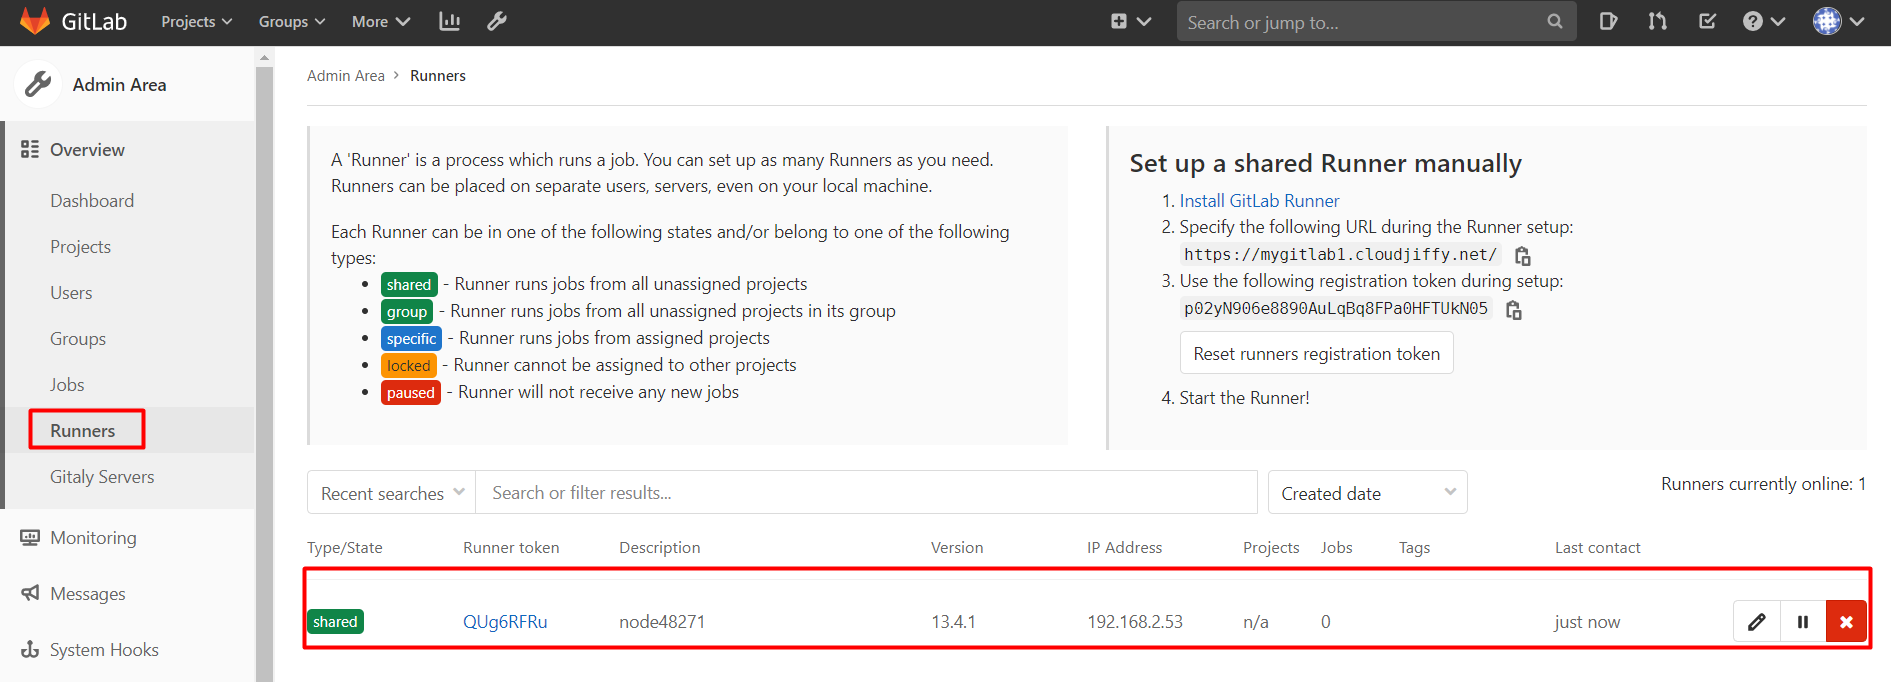
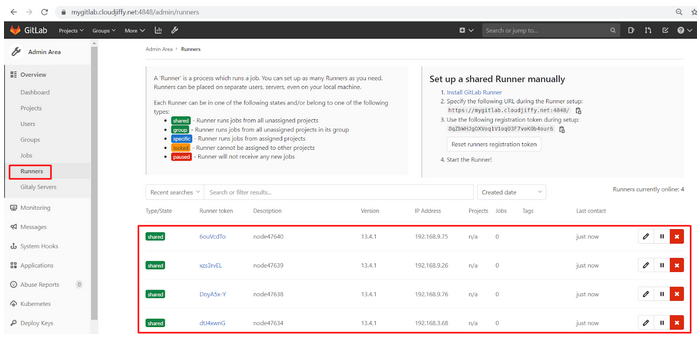
First of all, let’s make sure that the initial GitLab Runner instance is properly registered at the Git server. Open Admin area > Runners.
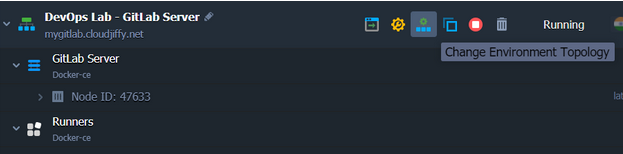
And to get more Runners, go to the Cloudjiffy dashboard and press the Change Environment Topology button.
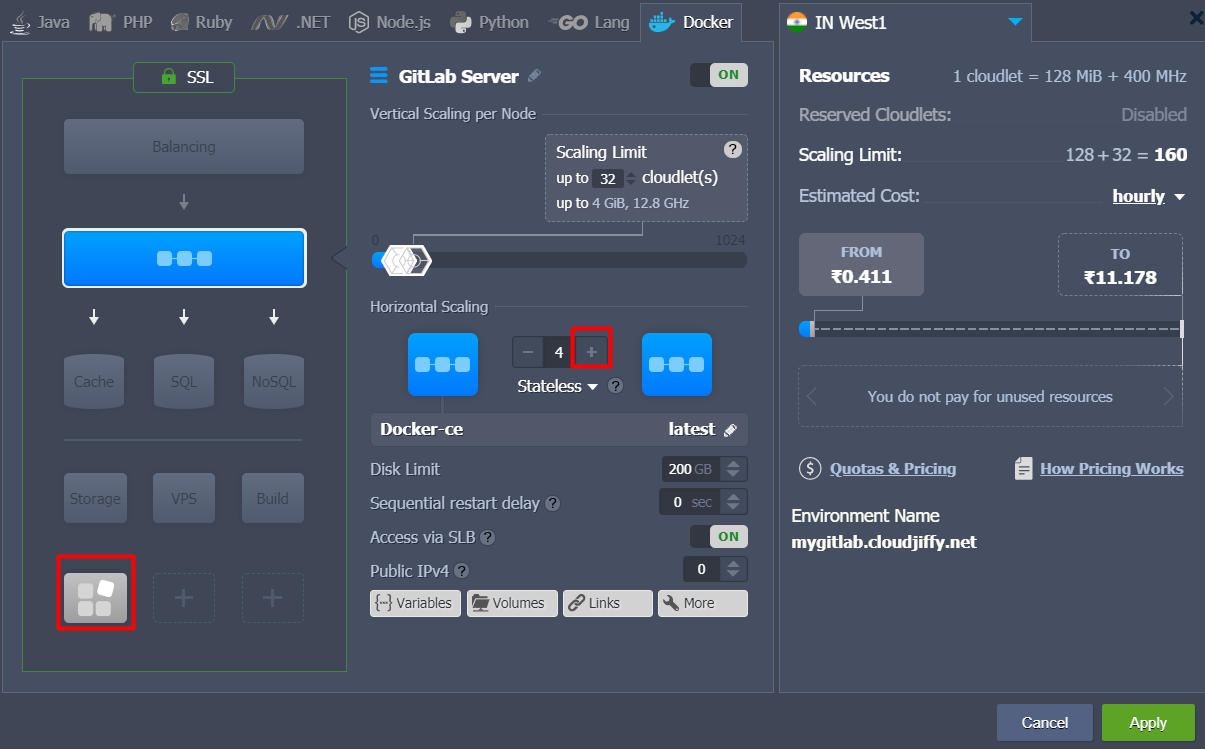
Then click on the Docker-ce icon and press the + button in the Horizontal Scaling section to add more Runner nodes. Finally, Apply changes.
Now, we have four Runner instances.
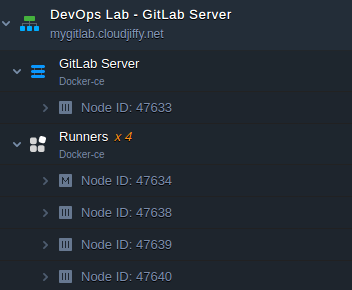
Using GitLab Admin Area, make sure the new instances are registered at your Git server.
Import Projects from GitHub
Let’s briefly review how to import projects from GitHub to our private GitLab Server hosted in Cloudjiffy PaaS.
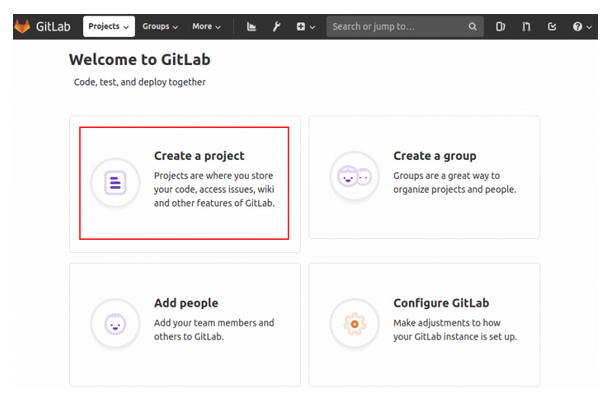
Once you logged in to the GitLab Server admin panel under the account which was automatically created for you, сlick on Create a project.
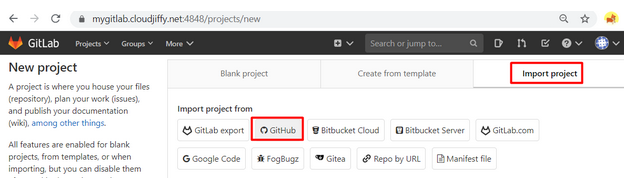
Then press Import project and after that click-on GitHub.
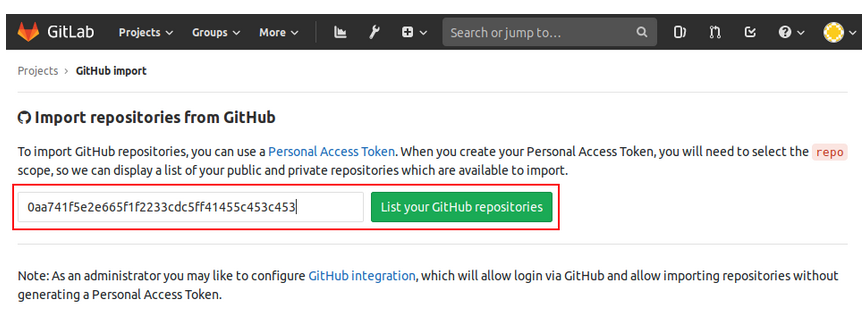
To import repositories, you have to get a Personal Access Token.
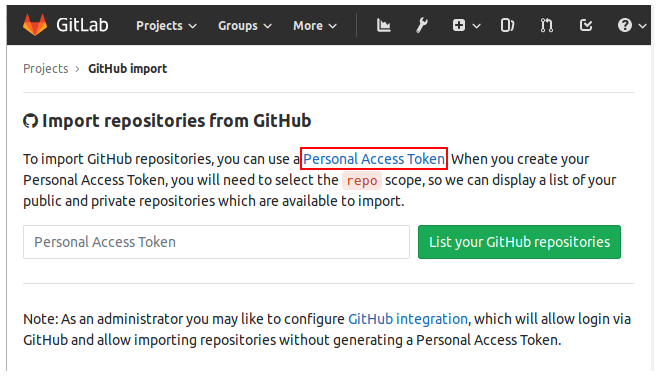
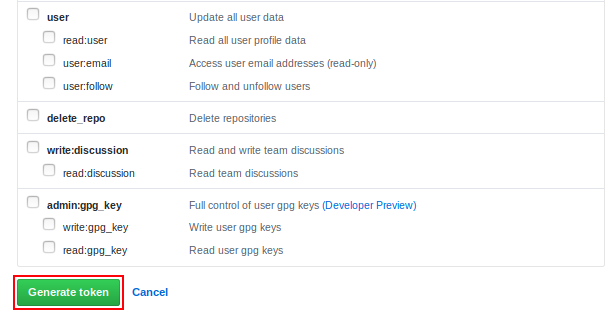
Choose the required scopes (at least, repo section to be able to manage repositories). Finally, press the Generate token.

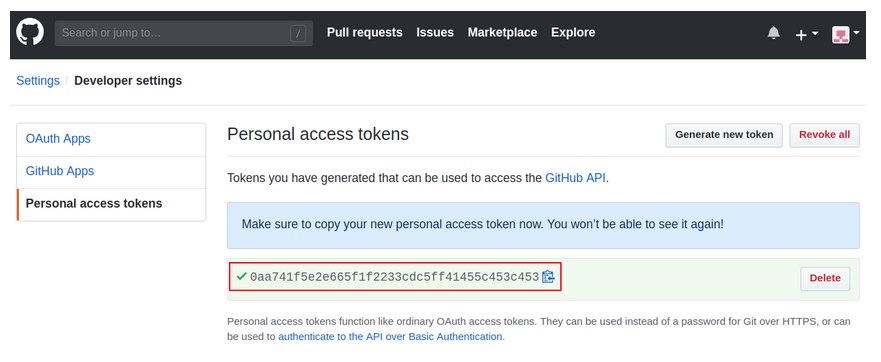
Copy the token, get back to Import Repositories from GitHub, paste it in a proper field, and submit by clicking the button.
Now you have an access to your repositories at GitHub. To begin importing, you should click on the corresponding Import button next to the required repository.
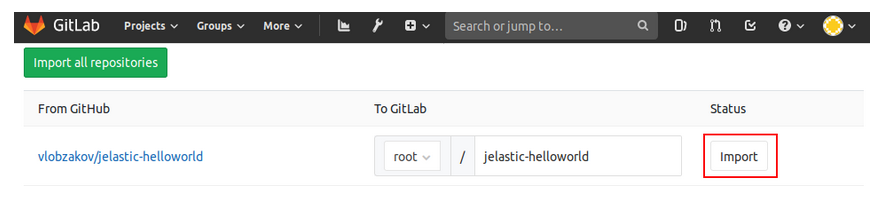
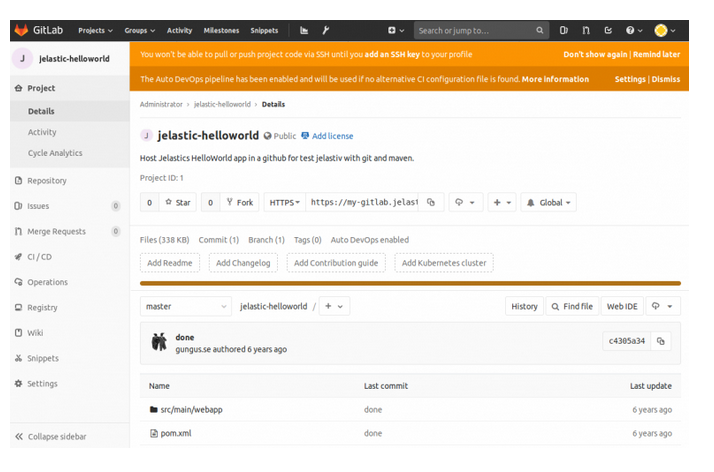
Importing is finished, the project was delivered to the local GitLab platform.
Docker Registry Access
As it was mentioned, the package provides Private Docker Registry. To connect to it, use details that can be found by Create a project > Registry. So, click on Create a project.
Fill out the project name (e.g. myproject) and create it. Then click on the Registry icon in the left pane.
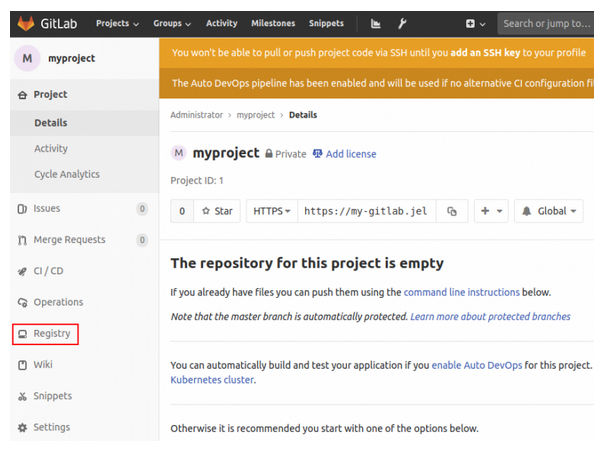
After that, you’ll be redirected to your private Docker Container Registry page. Take the connection string to ensure the Registry is accessible.
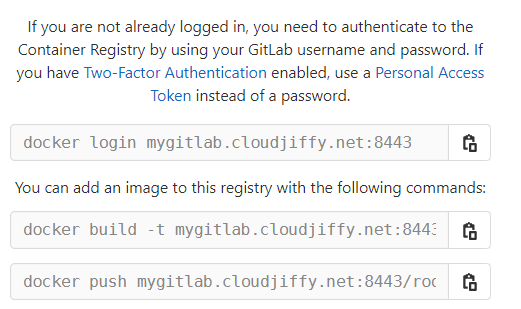
Issue a command to login into Registry from command line interface as follows:
sudo docker login mygitlab.cloudjiffy.net:8443
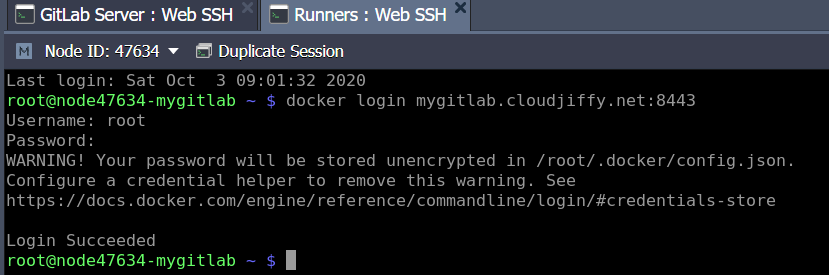
Tip: To avoid to use sudo with the docker command, add the user (in our case user is root as on the picture below) to Unix docker group with the command:
sudo usermod -aG docker root
More info: https://docs.docker.com/install/linux/linux-postinstall/
Custom Domain and Let’s Encrypt SSL
The installation window has an option to install Let’s Encrypt add-on that will provide an ability to generate an SSL certificate for a custom domain that is bound to your environment.
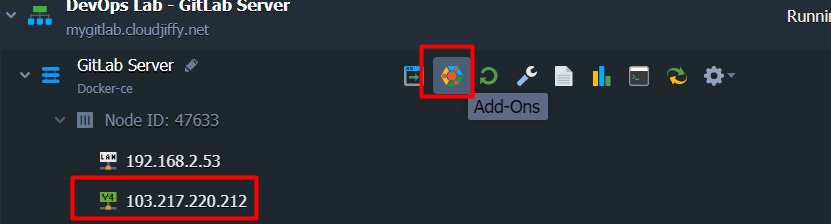
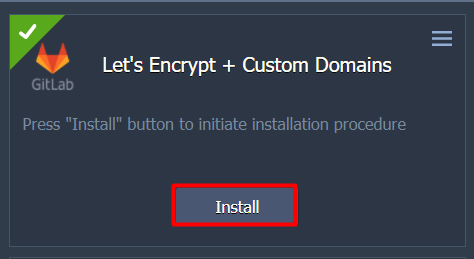
In this case, the environment will be created with the attached public IP and Let’s Encrypt staging certificate by default. To install a fully trusted production certificate, you have to bind a custom domain to the GitLab Server via A or CNAME records beforehand. For this, open Add-ons settings.
Find Let’s Encrypt Free SSL add-on and click on Configure.
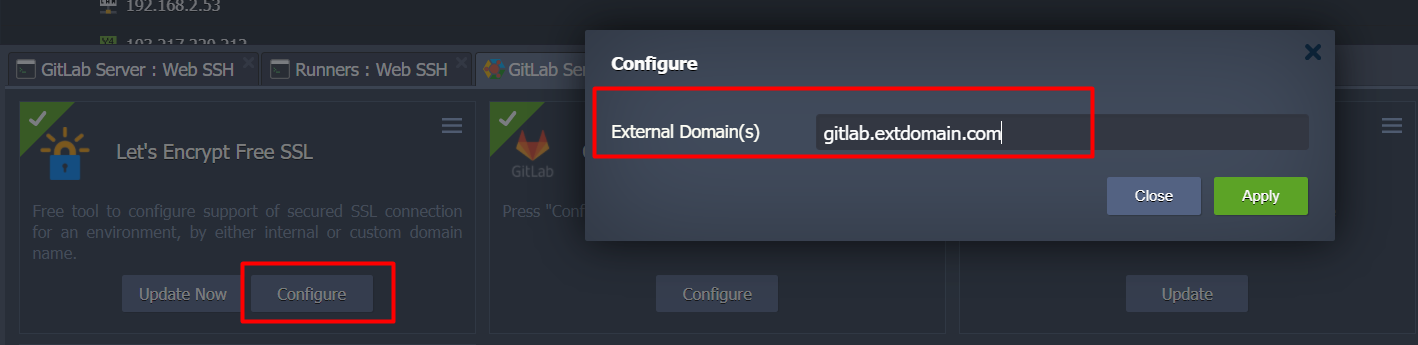
After that, specify the custom domain name e.g. gitlab.extdomain.com in the External Domain(s) field and press Apply.
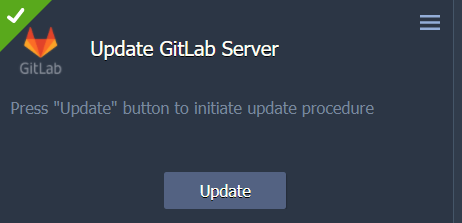
GitLab Server Update
The package has a built-in GitLab Server software update procedure that can be initiated via Update GitLab Server add-on, which comes installed by default. The update procedure checks whether a new version of the GitLab server is available at the repository and updates it if any.
To do this go to Add-Ons as described in the previous step, find the Update GitLab Server add-on, and just click on the Update button.
That’s it! Gain the required level of control, flexibility, and simplicity while managing your code in a dedicated GitLab server. Give a try within Cloudjiffy PaaS and share your experience.
Don’t have a CloudJiffy account? Visit https://cloudjiffy.com and click on Free Signup for free 14 days trial.