
Jira Project Management Software Installation and Configuration in the Cloud

Jira Software is a top project management tool that is highly popular among companies nowadays. It aims to help users set and prioritize the tasks, allowing them to manage the entire application development process without losing important points. A simple and intuitive interface lets you collaborate with colleagues and helps you perform work in an efficient manner.

Being team-oriented, Jira Software allows team members to use it to plan, track, and release effective software. You can create problem histories, plan sprints, and assign tasks to teammates. Besides, it offers real-time reporting and visual data to enhance productivity.
In this post, we will cover how to automatically install and easily configure a dedicated Jira Software within Cloudjiffy PaaS. The provided package is built based on the official Docker images that Atlassian creates, maintains, and publishes at Docker Hub repository: atlassian/jira-software. Additionally, you will find out how to set up a custom domain and secure the application with an SSL certificate.
Why use it on CloudJiffy?
- Easy to manage
- One-Click Installation
- Charges based purely on consumption (Pay As You Consume pricing) Thus helps you save cost
- Real-time scaling with an increase in users
- Data replication and backup solution to keep your data safe.
- Highly secure infrastructure
- Inbuilt CDN to cater to a worldwide audience
Create an Environment
Through the Cloudjiffy web interface, a “Jira” instance can be automatically deployed in a few clicks.
STEPS
Step 1: Log in to CloudJiffy.
Go to https://app.cloudjiffy.com/
Login using your credentials.
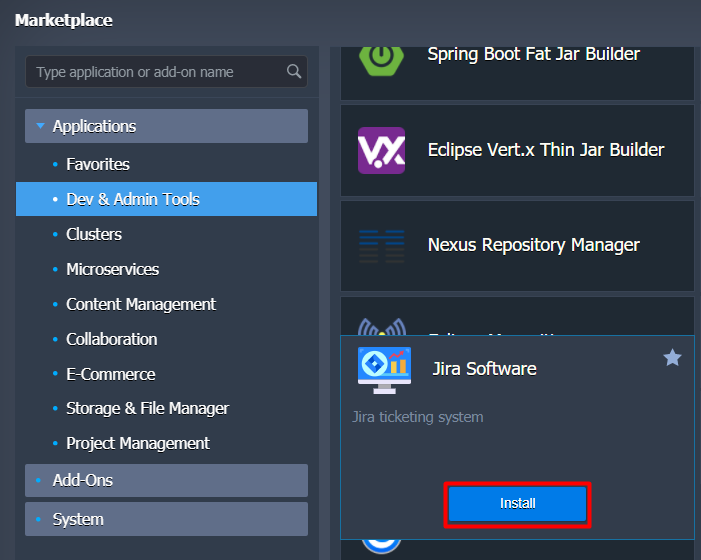
Step 2: Click on “Marketplace” to view the list of applications that can be installed automatically.

Step 3: A new window displaying the Apps will open, Select the “Jira Software” instance and click on “Install”.
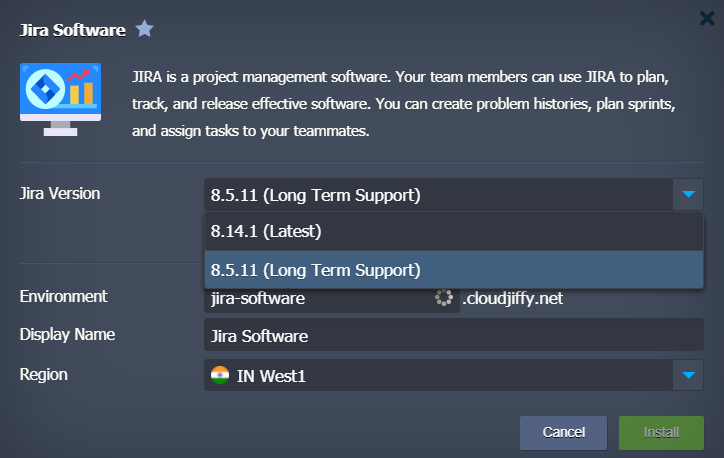
Decide which version you require:
- Latest release
- Long Term Support release
Within this article, we are covering production setup with the Long Term Support release of Jira Software.
If required, change the Environment name and destination Region.
Step 4: When the installation process is finished, the topology consists of three nodes. Out-of-box we get a dedicated load balancer node with public IP and trusted SSL certificate. PostgreSQL is the most popular database the Atlassian software employs. Therefore we use it as an external database connected to the Jira application.
Step 5: The success window appears with credentials and URL to begin the initial setup of Jira.

By default, Jira security is ensured with an SSL certificate issued for the domain name generated by the platform. The steps on binding custom domain to the environment are covered below.
Jira Configuration
1. During the further setup, you can change the default Application Title “Jira” with your own. e.g. “Our Advanced Collaboration System.”

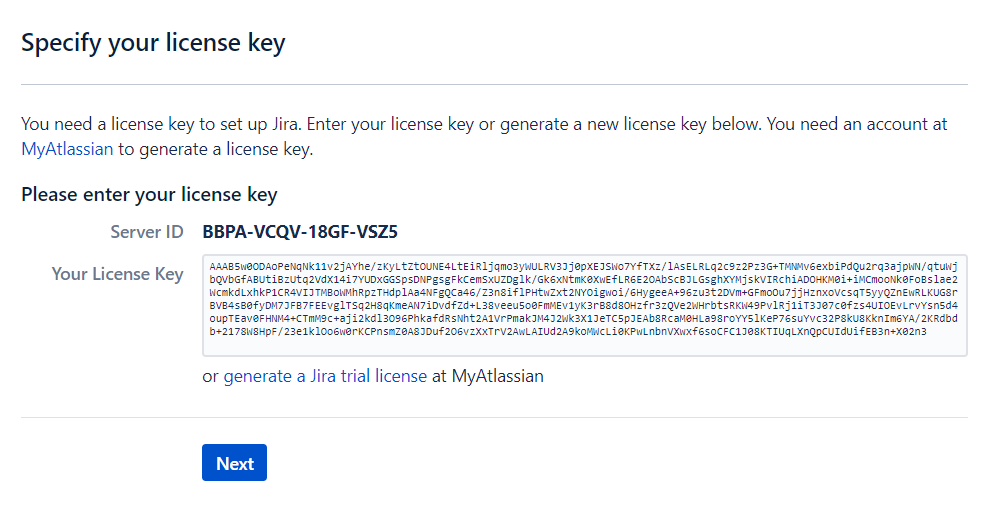
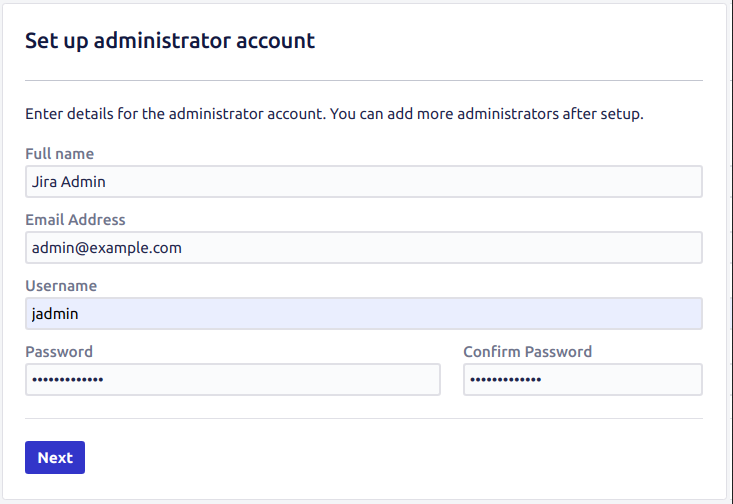
- Go ahead with the following steps providing:
- License Key which you should obtain from Atlassian
- Administrator account details
- Email configuration. You may configure it right now if you have an SMTP server already working. It can be custom one or using public most known services like Google or Yahoo. Simply fill in the form. This is an example of mail server settings.
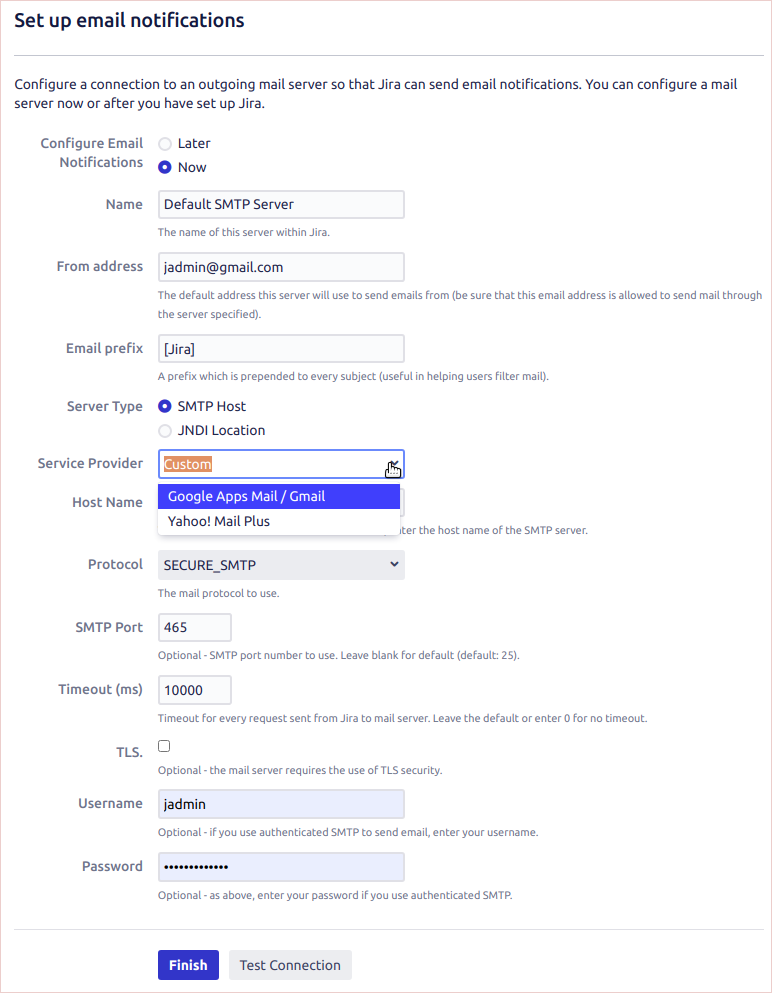
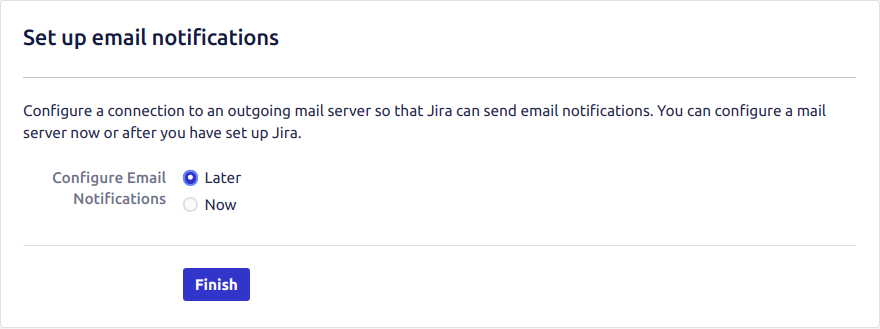
- If you have no SMTP service configured, just postpone the Configure Email option.
- Press Finish and proceed to the Jira Admin Settings such as Language and Avatar.
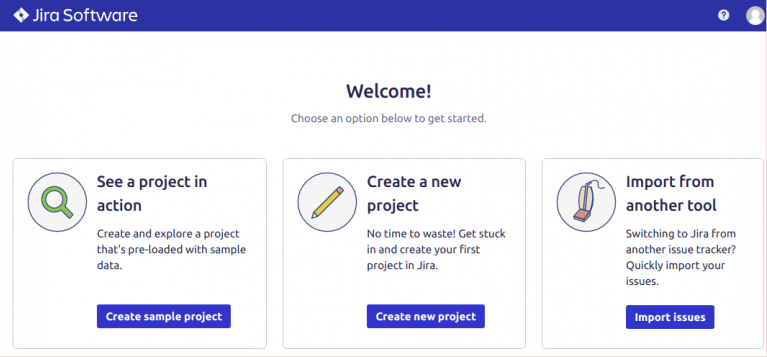
- Finally, the dashboard Welcome page appears.
Your Jira tracking system is ready to serve your team. And if you require moving this application under the custom domain, see the steps below.
Custom Domain Binding to Jira Environment
- Create an A Record for your custom domain bound to the generated public IP at your domain registrar e.g. jirateam.jele.website.

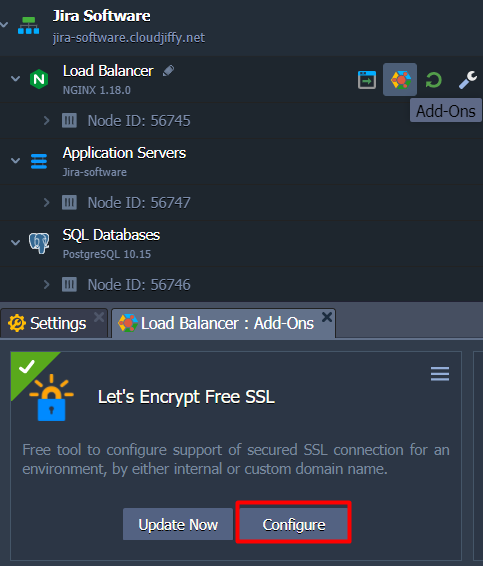
- Open Add-Ons next to the load balancer node. Find Let’s Encrypt Free SSL Add-On and press “Configure”.
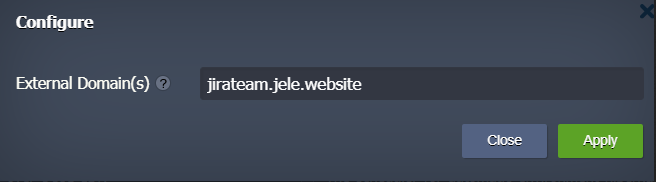
- Replace the default domain generated by the platform, e.g. “jira-software.cloudjiffy.net” with the custom one “jirateam.jele.website”.
4. Once the SSL certificate is successfully issued and installed, your application will be restarted and ready to work via a custom domain URL, e.g.: https://jirateam.jele.website.
- The informational popup windows will ask you to approve base URL updates. Just click on the “Update Jira’s base URL“.
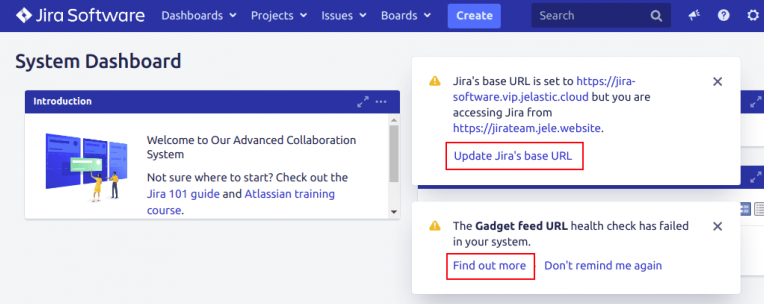
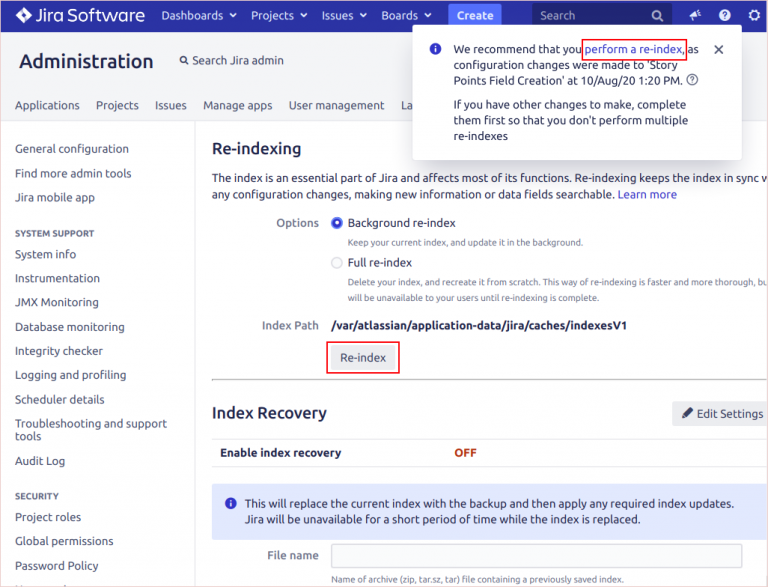
- Also, you need to fix a related health check issue due to URL mismatch. Press on “Find out more” to proceed to the database re-index page.
Jira requires to perform database re-index each time you change the application settings like base URL update. So, simply follow the recommendations and carry out the Re-index procedure.
Java RAM Usage Optimization while Running Jira Application
By default, docker images in atlassian/jira-software repository are configured to use ParallelGC Garbage Collector with parameters stated in /opt/atlassian/jira/bin/setenv.sh. With these settings, the Jira application consumes memory all the time at the same level and doesn’t release it back to the OS (operating system) even while being not active.

In order to improve cost efficiency and perform memory usage optimization, we investigated Java settings inside a container and discovered that RAM consumption can be reduced by:
- switching Garbage Collector from ParallelGC to the G1GC
- overriding the Xmx option instead of fixed 2048m. Now it is calculated as 70% of the available container’s RAM
This tuning is already implemented in the Jira installation package from Cloudjiffy for decreasing memory utilization.
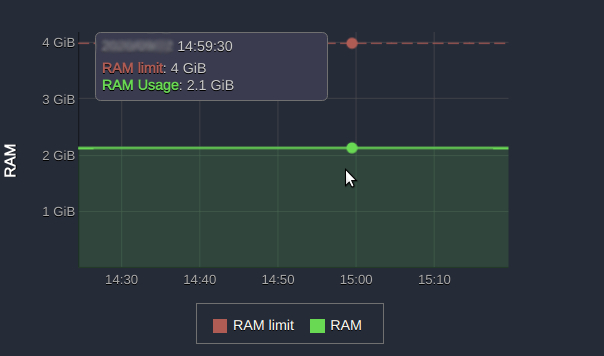
Such Java memory optimization gives you the possibility of cutting consumption and thus cloud hosting cost, as well as provides more flexibility while managing resources.
That’s it, now you know how to get a dedicated production-ready Jira installation in the cloud for structuring and analyzing your daily work routine.
Don’t have a CloudJiffy account? Visit https://cloudjiffy.com and click on Free Signup for a free 14 days trial.