
Install MQTT in Cloudjiffy at One-Click

Nowadays, MQTT is one of the most widely used protocols for IoT (Internet of Things) deployments. It utilizes a lightweight publish/subscribe messaging model, which is optimal for machine-to-machine (M2M) connectivity, especially in conditions of low network bandwidth and/or limited resource capacities. Herewith, the base of any MQTT infrastructure is represented with a central messaging broker (server),intended to manage notifications interchange, and connected to its instances (clients).
In this article, we’ll consider the Eclipse Mosquitto one-click installation package by Cloudjiffy, which allows to set up such an MQTT broker in just a minute. Being designed to handle a big number of simultaneous clients with minimal RAM usage, this solution is equally suitable for the administration of both full-powered machines and simple sensors or actuators. So, let’s investigate how to quickly get your personal Mosquitto message broker inside a Cloud and to take full control over all devices in your IoT network with its help.
Eclipse Mosquitto Package Specifics
The Eclipse Mosquitto package is intended to set up a ready-to-work Mosquitto MQTT message broker in one click. Upon its installation, an environment with the following topology specifics is created:
- contains a single Docker container with deployed eclipse-mosquitto image (latest tag)
- the default resource scaling limit for Eclipse Mosquitto container is set to 8 dynamic cloudlets, allowing to use up to 1 GiB of RAM and 3.2 GHz of CPU (these confines can be manually adjusted any time through the environment topology wizard if needed)
- a dedicated endpoint is automatically attached to a broker node, making it possible to access it from anywhere over the Internet (however, for production use, we recommend to assign Public IP address to this instance after the installation)
How the Device Interaction via MQTT Protocol Works
The MQTT protocol principles are somewhat similar to the client-server model since it’s operating with a single central broker and multiple clients, connected to it. Herewith, all interaction is performed through the subscribe/publish messaging. This allows keeping publishers and subscribers (i.e. clients) unaware of each other, as they are never connected directly – through the MQTT server only.

The general approach is quite simple – any MQTT client enables users to subscribe to a topic and/or publish on it. Herewith, each new topic message passes through a broker to be retranslated only to the clients that are subscribed to this particular thread. This way, inner message interchange between connected devices is performed implicitly, whilst you get all the essential information on the prescribed operations’ execution & device state almost instantly, gaining full control over your IoT network.
Why use it on CloudJiffy?
- Easy to manage.
- One-Click Installation.
- Charges based purely on consumption (Pay As You Consume pricing) This helps you save cost.
- Real-time scaling with an increase in users.
- Data replication and backup solution to keep your data safe.
- Highly secure infrastructure.
- Inbuilt CDN to cater to a worldwide audience.
Environment Creation
Through the Cloudjiffy web interface, an Eclipse Mosquitto instance can be automatically deployed in a few clicks.
STEPS
Step 1: Login to CloudJiffy.
Go to https://app.cloudjiffy.com/
Login using your credentials.
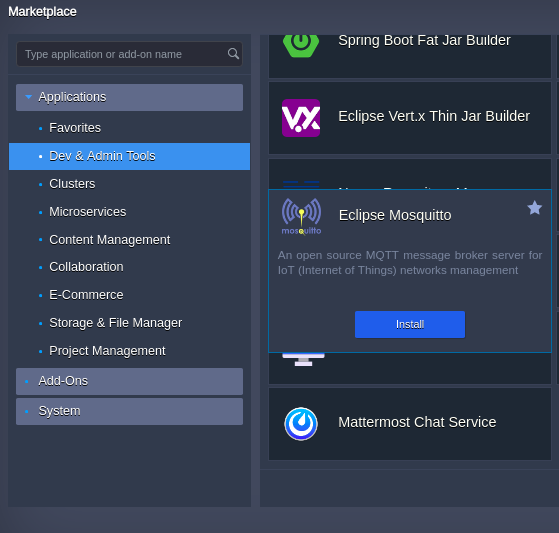
Step 2:Click on “Marketplace” to view the list of applications that can be installed automatically.

Step 3: A new window displaying the Apps will open, Select the “Eclipse Mosquitto” instance and click on “Install”.
Step 4: In the opened installation dialog box:
- type Environment name to be used as its internal hostname
- optionally, specify environment Display Name (so-called alias, for being shown within dashboard and SSH terminal)
select an environment Region (if multiple ones are available)
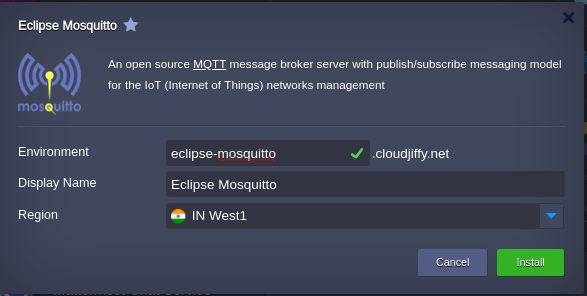
Click Install and wait a bit to be shown a notification message on this process completes.
In a minute, you’ll see a popup frame informing you about the successful package installation.
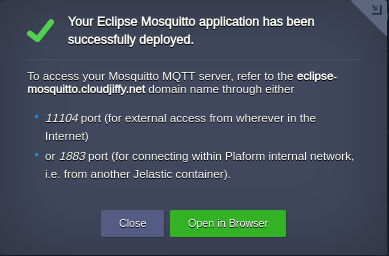
That’s it! Your Eclipse Mosquitto broker is ready for work now. Subsequently, the provisioned domain name and required port can be used to connect clients to this MQTT server.
Don’t have a CloudJiffy account? Visit https://cloudjiffy.com and click on Free Signup for a free 14 days trial.