
How to Deploy Redmine in Cloudjiffy PaaS
Redmine is an open-source web-based system for project management and bugs tracking. Written using the Ruby on Rails framework, it is cross-platform and cross-database.
In this tutorial, we will show you how to install and run your own Redmine application within Cloudjiffy Cloud Platform-as-Infrastructure.
You can have a Redmine instance up and running within minutes using the Cloudhiffy one-click install option.
Why use it on CloudJiffy?
- Easy to manage.
- One-Click Installation.
- Charges based purely on consumption (Pay As You Consume pricing) This helps you save cost.
- Real-time scaling with an increase in users.
- Data replication and backup solution to keep your data safe.
- Highly secure infrastructure.
- Inbuilt CDN to cater to a worldwide audience.
The process is simple – just click Install, type your email and install Redmine in a minute skipping the steps of manual installation.
Find the full list of applications available for one-click installation on our Marketplace page.
Environment Creation
Through the Cloudjiffy web interface, a Redmine instance can be automatically deployed in a few clicks.
STEPS
Step 1: Log in to CloudJiffy.
Go to https://app.cloudjiffy.com/
Login using your credentials.
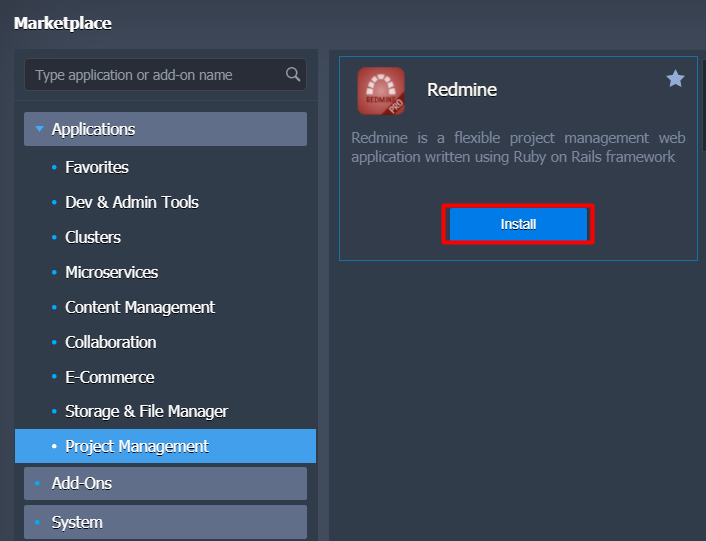
Step 2:Click on “Marketplace” to view the list of applications that can be installed automatically.

Step 3: A new window displaying the Apps will open, Select the “Redmine” instance and click on “Install”.
At this point, configure the name and environment of your instance.
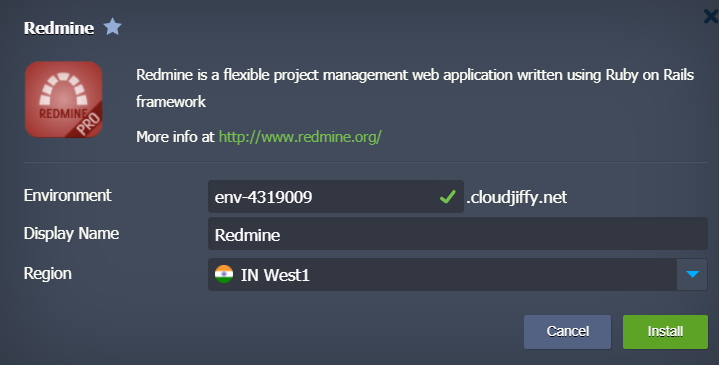
Then, start the automatic installation by clicking on “Install”.
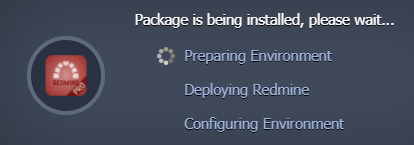
The system will take a few minutes to complete the installation and deployment of your new instance.
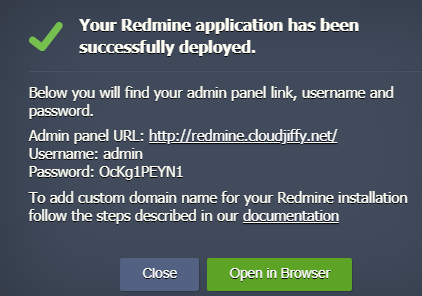
A confirmation message will warn you that the procedure has been carried out correctly and will show you the credentials of the Redmine administrator user, generated automatically by the system.
All the necessary credentials will be sent to your email after the environment is created please keep those in handy.
Step 4: Now your server is up and running.
Finally, press the Open in Browser button next to your environment.

Your Redmine application’s home page will be open.

Don’t have a CloudJiffy account? Visit https://cloudjiffy.com and click on Free Signup for free 14 days trial.