
Install Alfresco on Cloudjiffy PaaS at One-Click
Alfresco environment is an enterprise content management solution that you can use in the cloud, on-premise, and both.
Alfresco’s open and tightly integrated ECM and BPM platform is simple, smart, and secure. Align people, content, and processes to regain control of critical business content, strengthen compliance, and optimize processes – making collaboration easy for employees, partners, and customers.
Alfresco provides a modern environment for developing and deploying content-centric solutions – without the cost and complexity of on-premises legacy applications.
Features:
- The calendar Using this feature you can schedule and track events related to the current site.
- The wiki The site users can create pages for a collaborative wiki.
- The discussion forum Using this you can post user-generated content related to a site. These topics often take the form of questions or comments with threaded discussions.
- The blog It has a blog feature using that you can add commentary, descriptions of events, and other material related to your site.
- Site Links By using this feature site members compile a list of web links that are related to the site or that might be of interest to site users. These can be internal links pointing to site pages or external links pointing to any web address.
- Data lists The data lists component lets site members create and manage lists of data relevant to the site. Users can work with their own lists and can also contribute to lists created by other site members.
Why use it on CloudJiffy?
- Easy to manage.
- One-Click Installation.
- Charges based purely on consumption (Pay As You Consume pricing) This helps you save cost.
- Real-time scaling with an increase in users.
- Data replication and backup solution to keep your data safe.
- Highly secure infrastructure.
- Inbuilt CDN to cater to a worldwide audience.
Alfresco Automatic Installation
You can have an Alfresco solution up and running within minutes using the Cloudjiffy marketplace.
This is a step-by-step instruction on deploying Alfresco, an enterprise content management system, into Cloudjiffy PaaS so you can use it as an inexpensive hosted CMS. Cloudjiffy can natively run any Java application with no code changes required so the procedure below is applicable to most Java applications.
You can automatically get a preconfigured ready-to-work Alfresco instance up and running within minutes using Cloudjiffy Marketplace.
- Log in to your Cloudjiffy account and click the Marketplace button at the top of the dashboard.

- Search for the Alfresco solution in the opened window.
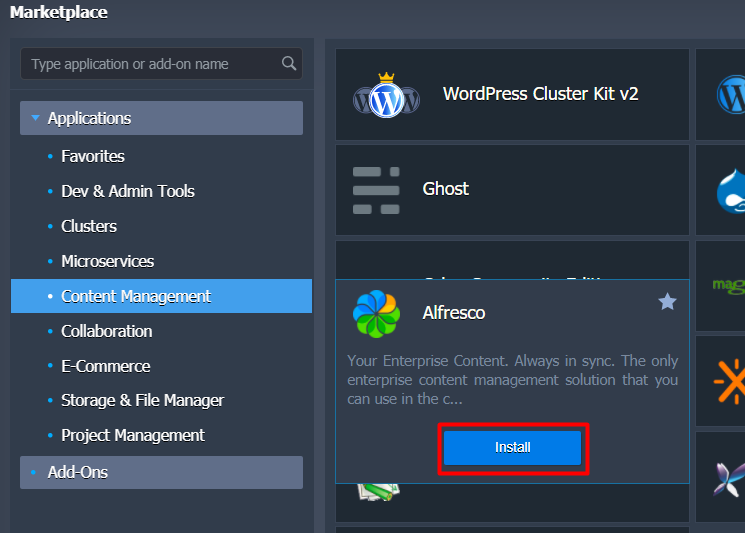
Hover over the located package and click Install.
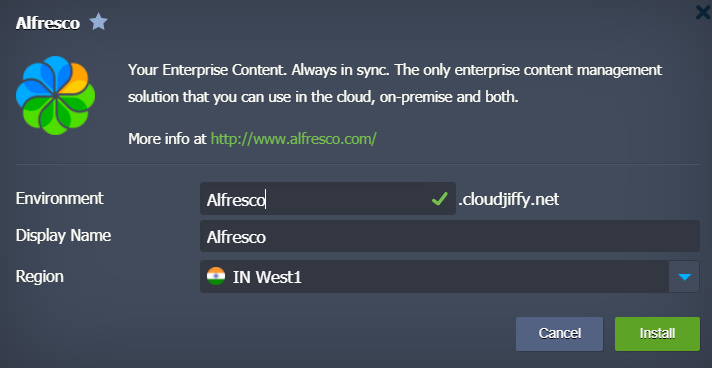
- Within the appeared installation frame, you can adjust the following fields:
Here you can specify a path to your git repo and change the env name, it will be your application domain.
- Environment – set your environment name.
- Display Name – define a preferable alias
- Region – select the environment region (if multiple are available)
Proceed with the Install button.
4. Wait for successful deployment
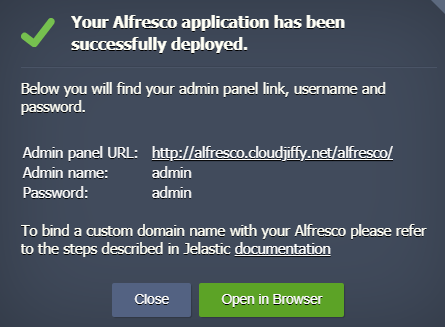
In a minute your environment will be created and appears in the environments list.
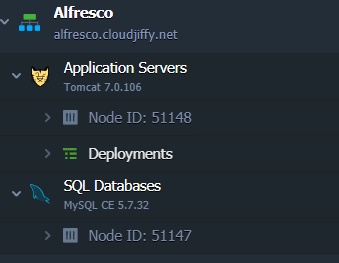
After this point, your application should be deployed and ready to handle requests.
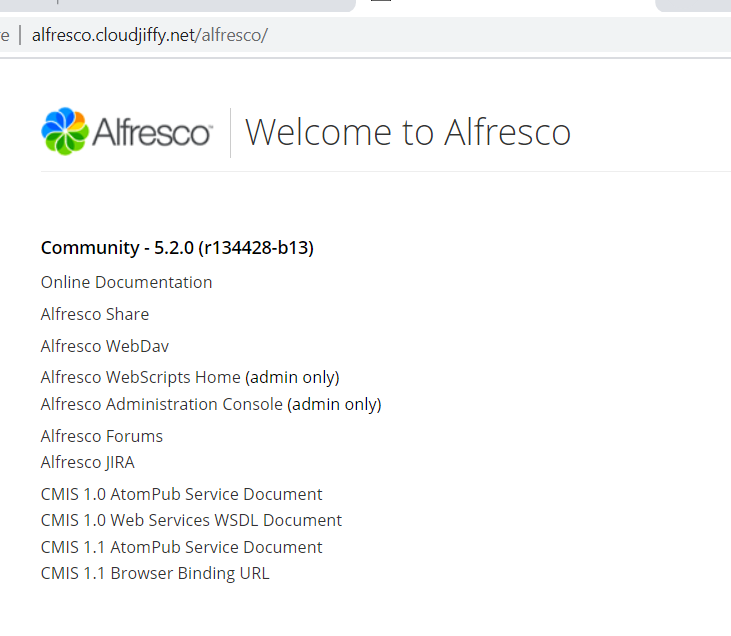
Click on the Open in Browser button to open the application
Don’t have a CloudJiffy account? Visit https://cloudjiffy.com and click on Free Signup for free 14 days trial.