
[BETA] – Introducing .NET Core Application Server in CloudJiffy
We are glad to announce that we have started the support for .Net core in CloudJiffy. This is an open-source, cross-platform version of .NET for building websites, services, and console applications. This is often used for cloud applications or also can be used for refactoring large enterprise applications into microservices.
A .NET Core consists of the following components:
- .NET Core runtime – provides essential services (type system, assembly loading, garbage collector, etc.). Framework libraries provide primitive data types, app composition types, and fundamental utilities
- ASP.NET Core runtime – provides a framework for building modern, cloud-based, internet-connected applications (web apps, IoT apps, and mobile backends)
- .NET Core SDK and language compilers (Roslyn and F#) – allow the development of the .NET Core projects
- .Net command – launches .NET Core applications and CLI commands. It selects and hosts the runtime, provides an assembly loading policy, and launches apps and tools
Why use it on CloudJiffy?
- One-Click Installation
- Easy to manage
- Charges based purely on consumption (Pay As You Consume pricing)
- Real-time scaling with an increase in users
- Data replication and back up solution to keep your data safe.
- Highly secure infrastructure
- Inbuilt CDN to cater to a worldwide audience
How to Create .NET Core Server On CloudJiffy
1.Log in to the Cloudjiffy dashboard and click the New Environment button at the top-left corner.
![]()
2.Within the opened topology wizard, navigate to the .NET tab and select the .NET Core application server. Configure the other parameters (cloudlets, disk limit, public IPs, etc.) up to your needs.
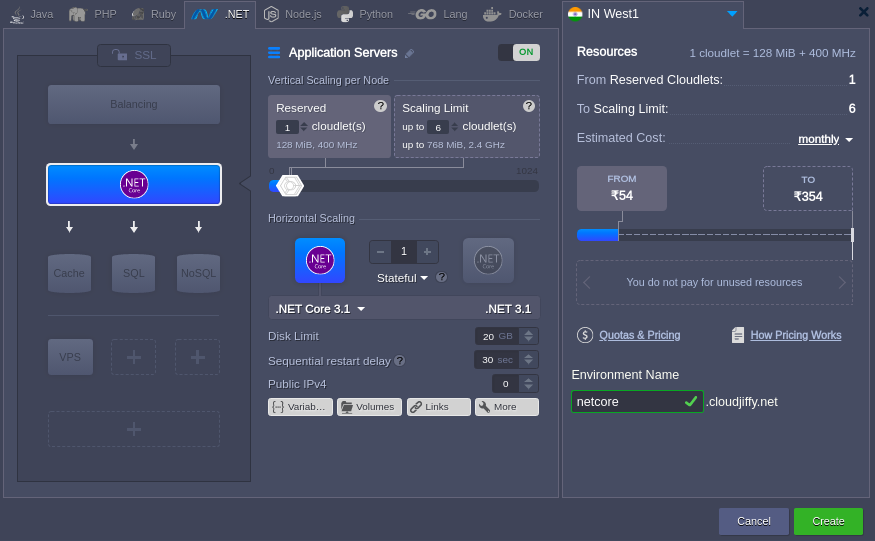
Click Create to proceed.
3.Your environment with the .NET Core server will be created in a few minutes.
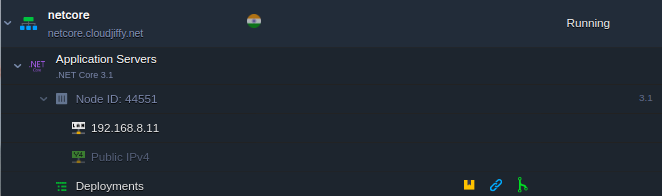
The application server operates in a separate container (node) – an isolated virtualized instance – provisioned for a software stack. The container has its own private IP and unique DNS record.
Deploying Application to .NET Core Server
Cloudjiffy PaaS provides multiple options to automatically deploy projects. In this example, we’ll add a simple .NET project stored on GitHub.
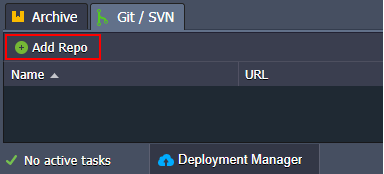
1.Open the Git/SVN tab of the Deployment Manager to add a new repository.
Tip: If you are interested in creating your own .NET application follow the official documentation.
2.Provide the necessary URL and Branch for your project.
Note: In case there are multiple applications in a single repository, you can select the particular one by adding a dedicated APP_NAME variable with the required folder as a value.


Click Add to save the project in your Deployment Manager.
3.Open the Deployment dialog using deployment option in the image below:
4.Within the opened frame, you need to select an application to be deployed, branch, and the target environment.
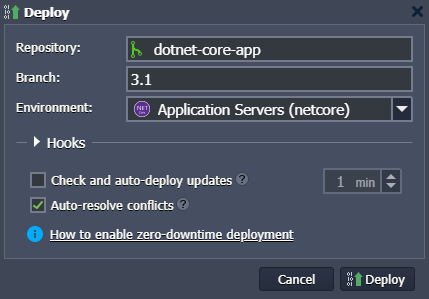
Note: Similar to the Python, Node.js, and Go programming languages, the .NET Core has a single context (i.e. only one app can be deployed at a time).
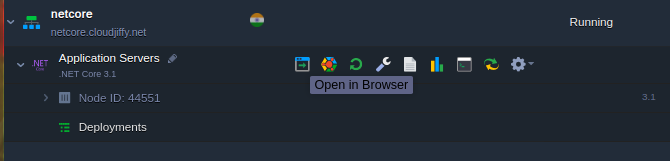
5.In a minute, the application will be deployed and can be accessed using the Open in Browser button next to the .NET Core application server.
Your web application should open in a new browser tab. In our case, it is just a simple .NET website.

Use this guide as a reference to deploy your own application to the .NET Core server.
Don’t have a CloudJiffy account? Just visit our website and click on ‘Free Signup’ and get a trial for 14days.