
Install OpenFaas – Serverless Functions on CloudJiffy PaaS at One-Click

Simple, powerful functionality from anywhere, any code, and autoscale. The main core of this service is to make it easy for developers to deploy event-driven functions, APIs, and microservices to Kubernetes. To get auto-scaling and metrics the code should be in a package or an existing binary in a Docker image.
Salient Features of OpenFaas:
- User-Friendly portal with one-click installation.
- Auto Scaling on-demand basis or zero down when idle.
- Portable – You can run this service in the existing hardware/ private cloud with Kubernetes or container integration.
- Command Line Interface is available with YAML format for defining functions and templating.
- Code in any language that supports the Linux or Windows OS.
Why use it on CloudJiffy?
- Easy to manage.
- One-Click Installation.
- Charges based purely on consumption (Pay As You Consume pricing) This helps you save cost.
- Real-time scaling with an increase in users.
- Data replication and backup solution to keep your data safe.
- Highly secure infrastructure.
- Inbuilt CDN to cater to a worldwide audience.
OpenFaas Automatic Installation
This is a step-by-step instruction on deploying OpenFaaS, a content management system, into Cloudjiffy PaaS. Cloudjiffy can natively run any Java application with no code changes required so the procedure below is applicable to most Java applications.
You can automatically get a preconfigured ready-to-work OpenFaaS Application instance up and running within minutes using Cloudjiffy Marketplace.
- Log in to your Cloudjiffy account and click the Marketplace button at the top of the dashboard.

- Search for the OpenFaaS solution in the opened window.
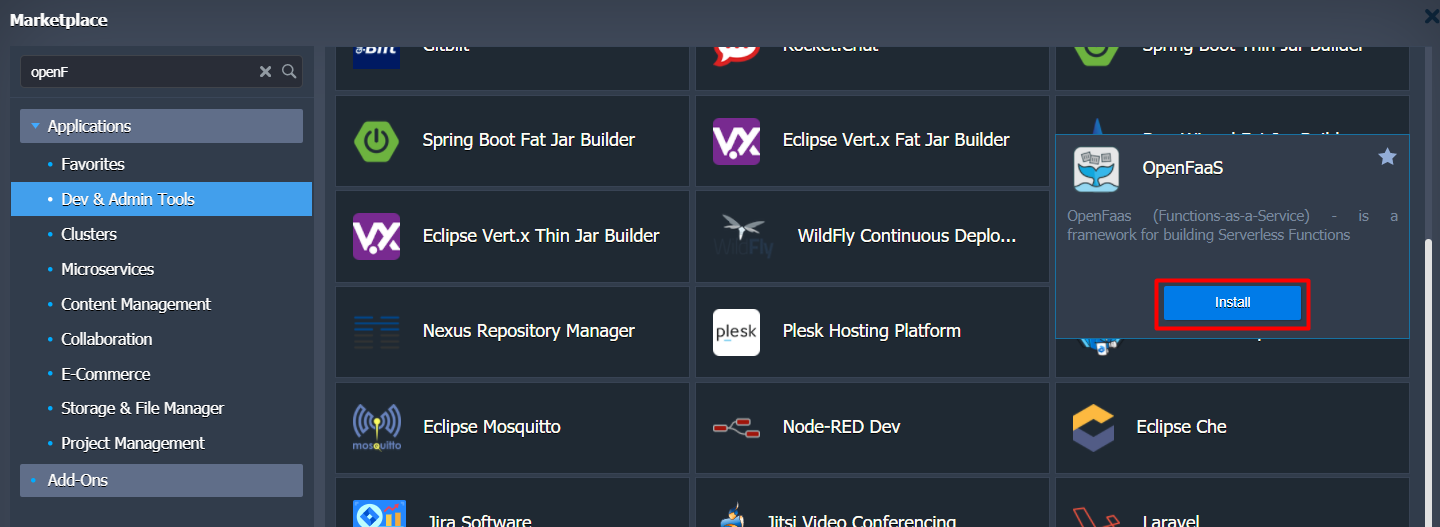
Hover over the located package and click Install.
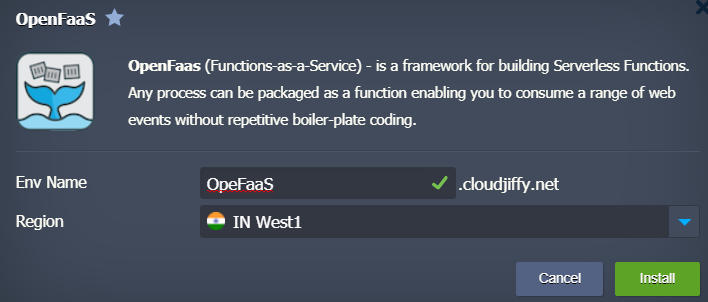
- Within the appeared installation frame, you can adjust the following fields:
Here you can specify a path to your git repo and change env name, it will be your application domain.
- Environment – set your environment name.
- Region – select the environment region (if multiple are available)
Proceed with the Install button.
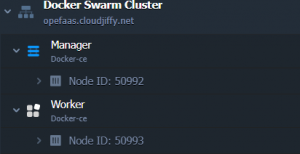
4 – Wait for successful deployment
In a minute your environment will be created and appears in the environments list.
5 – Open in browser
After this point your application should be deployed and ready to handle requests.
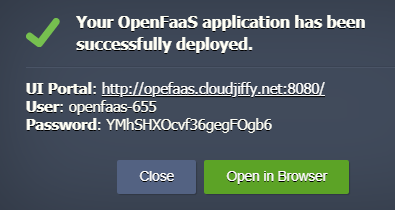
Click on the Open in Browser button to open the application

Don’t have a CloudJiffy account? Visit https://cloudjiffy.com and click on Free Signup for free 14 days trial.