
{{mpg_slider_title}}
{{mpg_slider_description}}
{{mpg_list_1}}
{{mpg_list_3}}
{{mpg_list_5}}
{{mpg_list_2}}
{{mpg_list_4}}
{{mpg_list_6}}

{{mpg_section_2_title}}
{{mpg_section_2_description}}
{{mpg_section_3_title}}
{{mpg_section_3_description}}
{{mpg_section_4_title}}
{{mpg_section_4_description}}
Installation Process
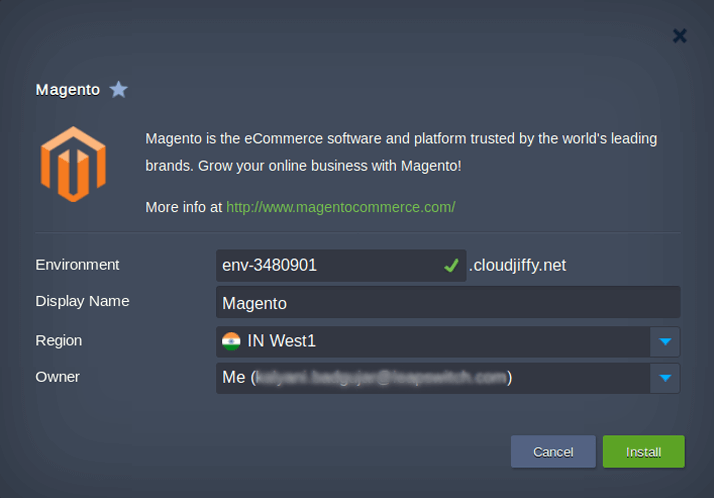
- Step: 1
In the opened confirmation window at Cloudjiffy dashboard, type the Environment name, optionally, customize its Display Name. Then, select the preferable region (if several are available) and click on Install.
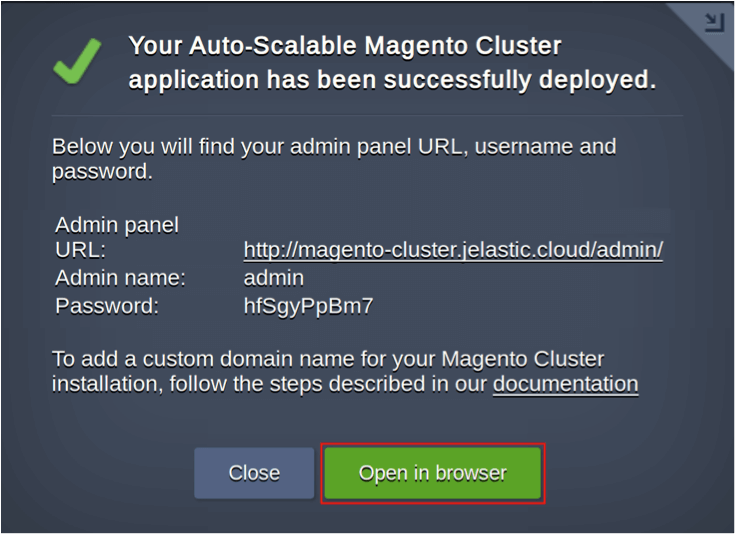
- Step: 2
Once the deployment is finished, you’ll see the appropriate success pop-up with access credentials to your administration Magento panel, whilst the same information will be duplicated to your email box.
Customization
Fine tuning and customization: multi-cloud HA and DR, geo distributed load balancing, performance optimization, WAF, CDN and other required addons can be installed afterward on demand.
