
Database Cluster Recovery in CloudJiffy
The MariaDB/MySQL Database Auto-Clustering solution is packaged as an advanced highly available and auto-scalable cluster. Once the database failed and becomes inaccessible you can use this automated solution for database restoration and even recovery of fully corrupted node.
Why use it on CloudJiffy?
- Easy to manage.
- One-Click Installation.
- Data replication and backup solution to keep your data safe.
- Highly secure infrastructure.
The process is simple –visit our Marketplace and click on Add-Ons search for Database Cluster Recovery. Give your environment a name select node, enter user, password and click on Install. Done!
The Database Cluster Recovery add-on supports the following database clusters:
- Primary-Secondary Cluster based on the MariaDB and MySQL stacks
- Primary-Primary Cluster based on the MariaDB and MySQL stacks
- Galera Cluster based on the MariaDB stack
Install Database Cluster Recovery on CloudJiffy?
Step 1: Login to CloudJiffy.
Go to https://cloudjiffy.com/ for your account or Log into your CloudJiffy account.Step 2:Click on “Marketplace” In Add Ons section you will be able to see Database Cluster Recovery.
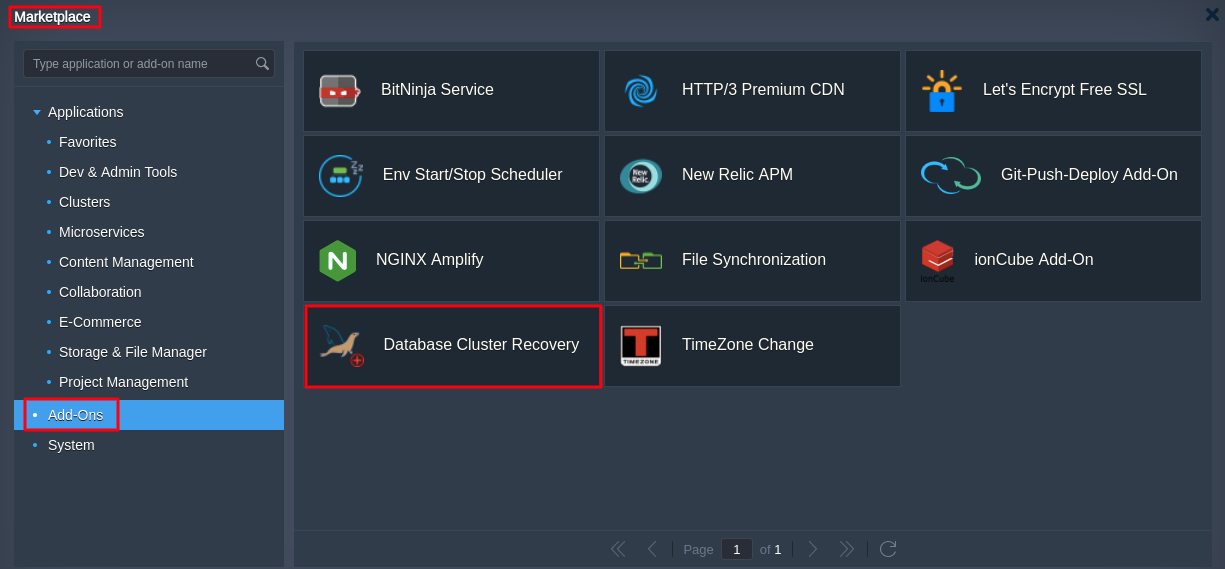
Step 3: A new window displaying the Add on will open, Select the “Database Cluster Recovery” instance.
In the opened confirmation window, provide the required data:
- User and Password – the database admin user credentials
- Environment name – select an environment with the required database cluster from the list
- Nodes – choose a layer with the database cluster

Step 4: Click Install and wait a few minutes for the add-on to be installed. It will appear in the list of add-ons of the appropriate layer.

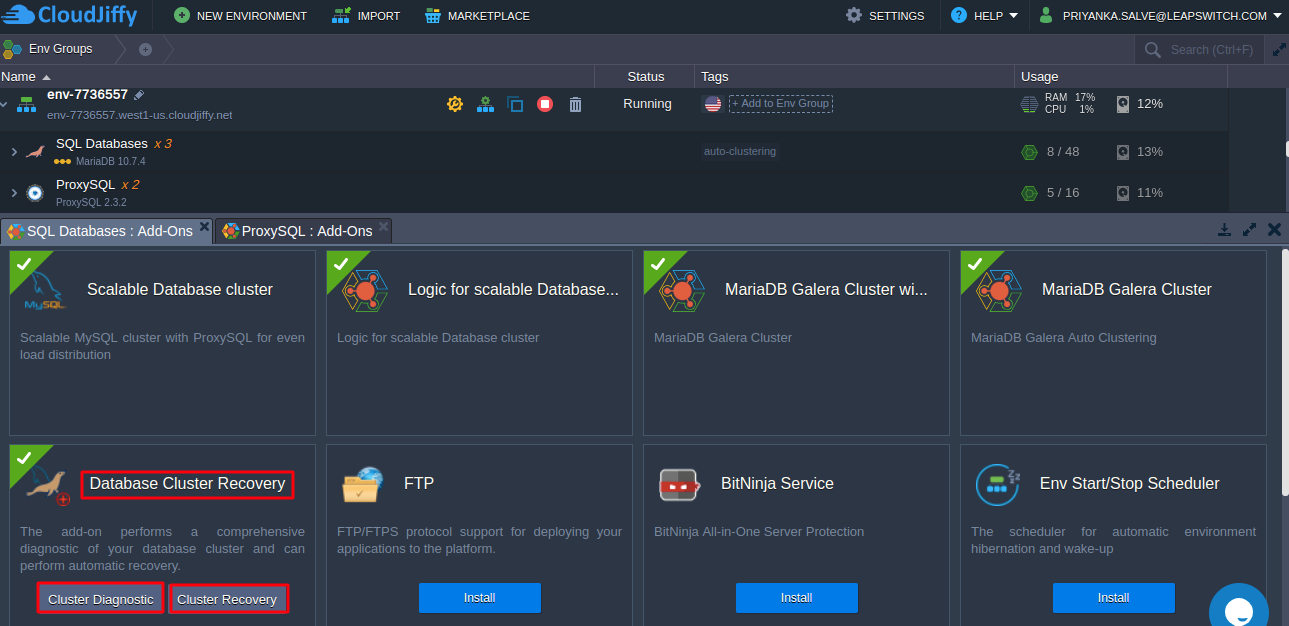
Step 5:The add-on can perform two actions that can be executed by clicking the appropriate buttons:
- Cluster Diagnostic – detects problems with the database cluster (scans if nodes are accessible and databases are consistent)
- Cluster Recovery – tries resolving common problems to restore cluster operability
The result of the Cluster Diagnostic action can be either “Cluster is OK” or “Errors discovered” dashboard notification.
Step 6: The Database Cluster Recovery add-on can operate in the diagnostic and recovery modes. The first one scans the database to identify if there are any problems, and the second tries to resolve the issue based on the obtained information.
The platform offers a free diagnostic and recovery add-on to help with database maintenance.

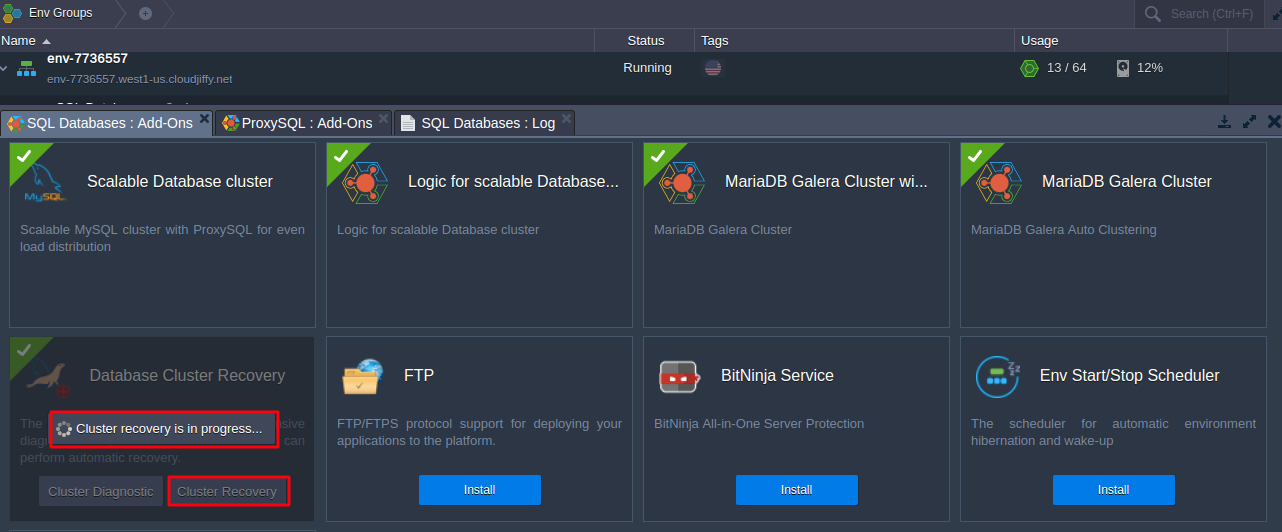
Step 7: In case some problems are discovered, you can try to resolve them automatically with the Cluster Recovery action. It should handle most of the issues and fully restore cluster operability:

Please hold for some time until the Cluster recovery completes.
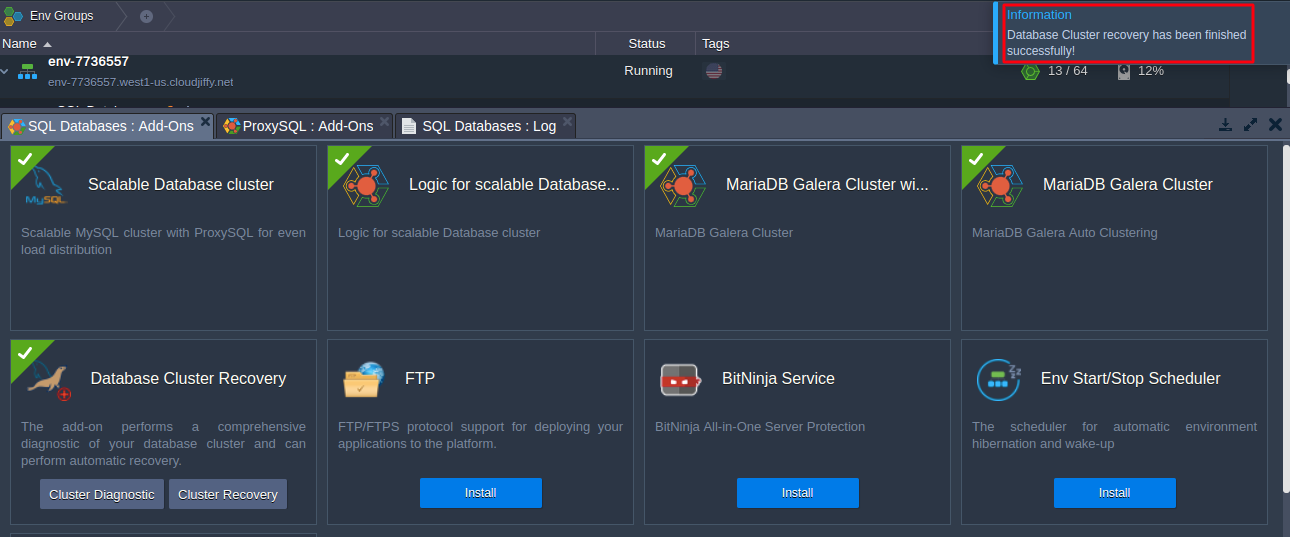
Once the Database Cluster Recovery is done you will be see the pop up notification for successful completion.
Step 8: In order to perform required recovery operations, the add-on applies the following adjustments to the database cluster during the installation.
A replica user is added to perform the validation of the clusters. Also, this user is used in the ProxySQL configuration.
The credentials can be viewed via the dedicated environment variables:
- REPLICA_USER: repl-xxxxxx
- REPLICA_PSWD: xxxxxxxxxxxx

For additional details or in case of recovery failure, you can check the db_recovery log mentioned above.
That’s it!
Don’t have a CloudJiffy account? Visit https://cloudjiffy.com and click on Free Signup for a free 14 days trial.
Happy Hosting!