
Dropwizard Automatic Build and Deploy to Cloud-Native Microservices

Today we keep covering the topic of building Java microservices, so decided to pay heed to a popular framework, called Dropwizard. Comparing to alternatives, this framework is pretty lightweight and rapid in getting web-services up and running. This makes it a perfect choice for microservice architecture.
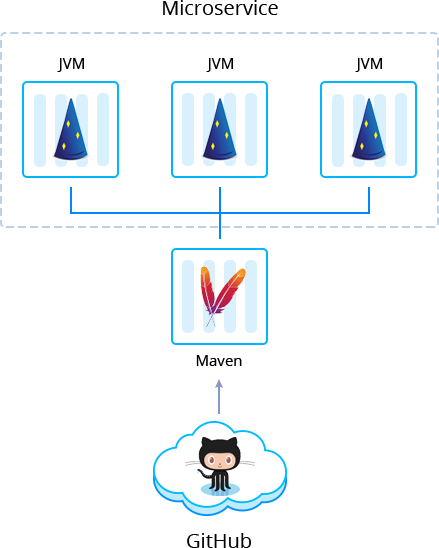
In this article, we will go through the steps of building a Dropwizard based Java application as a JAR file and deploying it as a scalable microservice to the cloud. The process will be automated with a help of Dropwizard Fat Jar Builder that creates a Maven build node with a set of JVM servers and initiates the application deployment.
Why use it on CloudJiffy?
- Easy to manage.
- One-Click Installation.
- Charges based purely on consumption (Pay As You Consume pricing) This helps you save cost.
- Real-time scaling with an increase in users.
- Data replication and backup solution to keep your data safe.
- Highly secure infrastructure.
- Inbuilt CDN to cater to a worldwide audience.
Dropwizard Fat Jar Builder Automatic Installation
You can automatically get a preconfigured ready-to-work Dropwizard Fat Jar Builder instance up and running within minutes using Cloudjiffy Marketplace.
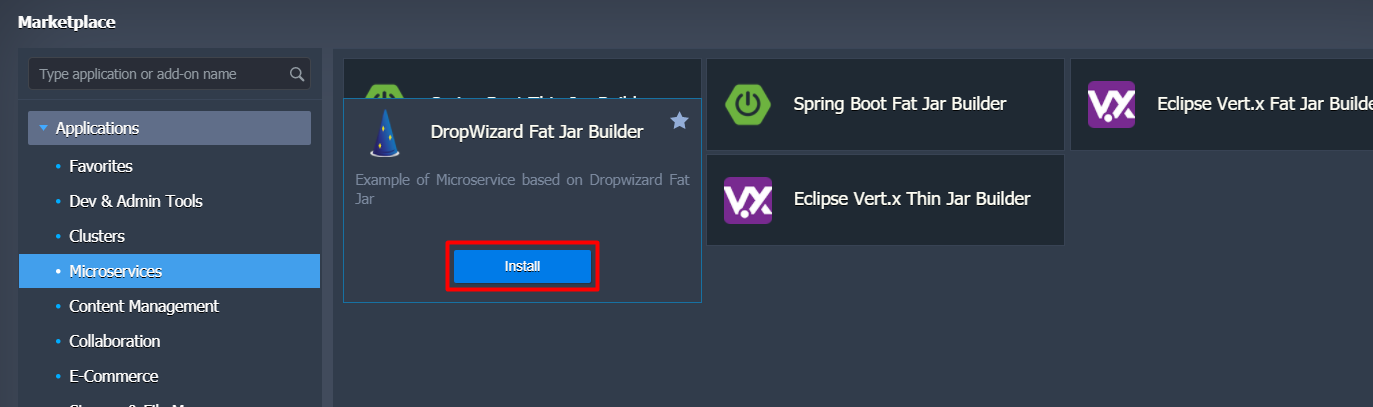
Log in to your Cloudjiffy account and click the Marketplace button at the top of the dashboard.

Search for the Dropwizard Fat Jar Builder in the Marketplace and click Install.
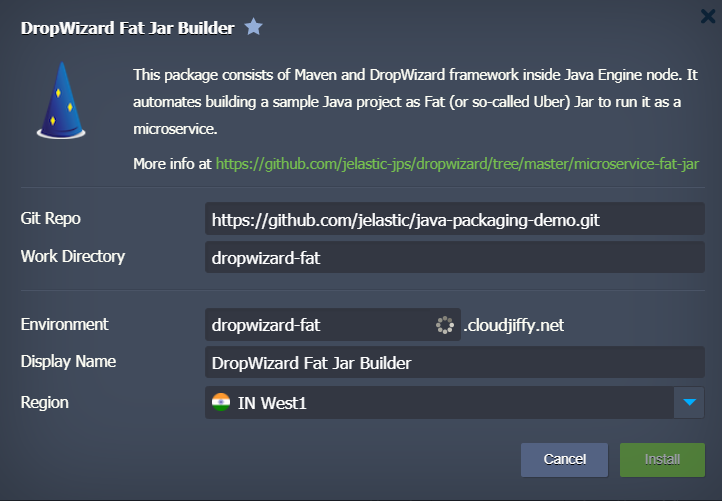
Change the installation settings if you need (for example, you can use the link to the custom project in the Git Repo field). Then press Install.
When the installation and building of the project are completed, a corresponding message appears. You still need to wait a few minutes for the deployment to be finished (feel free to track the process in the Tasks panel). In the default implementation, it is done under api/greeting context.
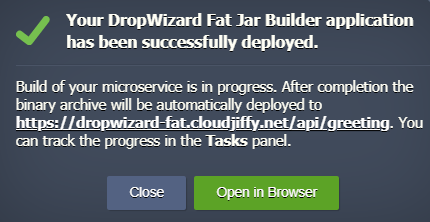
Afterward, you can make sure that the application is up and running by pressing the Open in browser button.
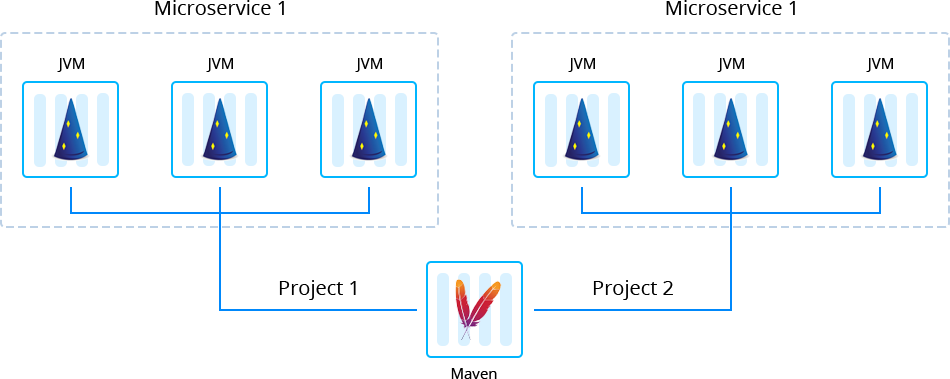
Running Multiple Microservices with Dropwizard Projects
You can use just created Maven node for building extra projects and deploying them to different environments to get a set of distributed microservices.
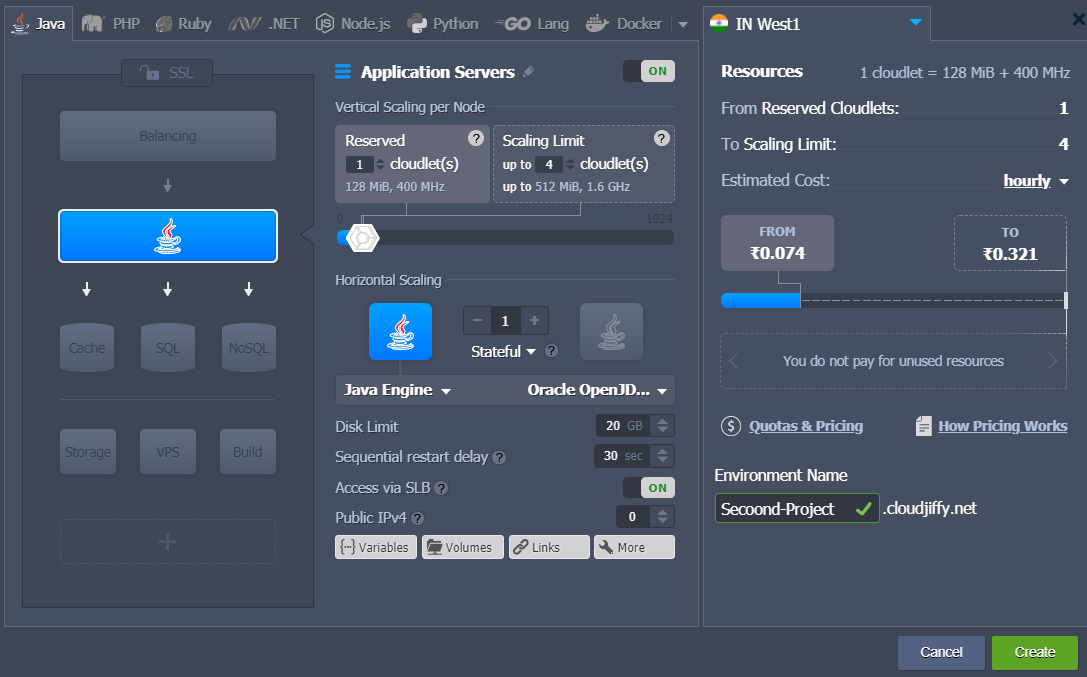
First of all, create a separate environment with Java Engine.
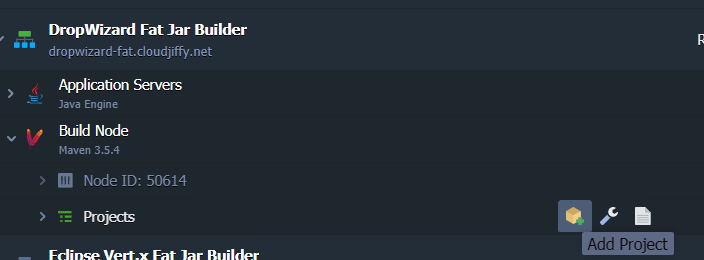
Then click Add Project next to the Maven node in the initial environment.
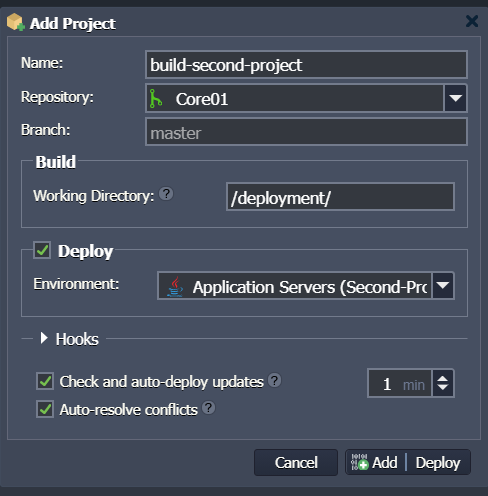
Specify the name and link to the project, as well as choose the environment where it should be deployed. Additionally, you can activate automatic updates. Then confirm pressing Add + Deploy.
More details on how to build and deploy Java applications can be found at the Maven node documentation.
In this way, you can easily build and deploy your Dropwizard based applications. Register and try out the automated JAR packaging with Cloudjiffy Builder add-on for your custom projects to feel the benefits of microservices running in the cloud.
Don’t have a CloudJiffy account? Visit https://cloudjiffy.com and click on Free Signup for a free 14 days trial.